Windows 11 with JAWS Lesson 5
Desktop Navigation with JAWS
Resources
ZIP file of all resources for lesson 5 (alternatively, download individual files below)
dSurf Recommended JAWS Settings for Classroom Environments
Back to Windows 11 Training Page
Objectives
By the end of this lesson you will understand, be able to discuss, and/or perform the following tasks as they relate to using Windows 11:
- Use the keyboard for basic Windows desktop navigation
- Find and use the Start Button
- Navigate through icons on the Taskbar
- Navigate through the Taskbar Corner Overflow area and System Tray
Using the Keyboard for Navigation
In this segment let us use the keyboard to navigate through the Windows 11 environment.
The Windows Desktop List View
I have JAWS running and I will press WINDOWS key+D to move to the desktop list view. You may use the ARROW keys or first letter navigation on the desktop. I will press the letter J to move to the first JAWS icon on the page. Pressing that same keystroke, J, moves focus to the next item in the list that begins with that letter, if more icons beginning with that letter are available. In my case, I have two versions of JAWS installed on my computer for testing purposes. I will press the letter J again a few times. Focus eventually wraps back to the first icon beginning with that letter. Once focus is on the icon for an app you wish to launch, just press the ENTER key.
The Start Button and Pinned Icons on the Taskbar
Let us look at the Start button and the pinned icons at the bottom of the screen on the Taskbar.
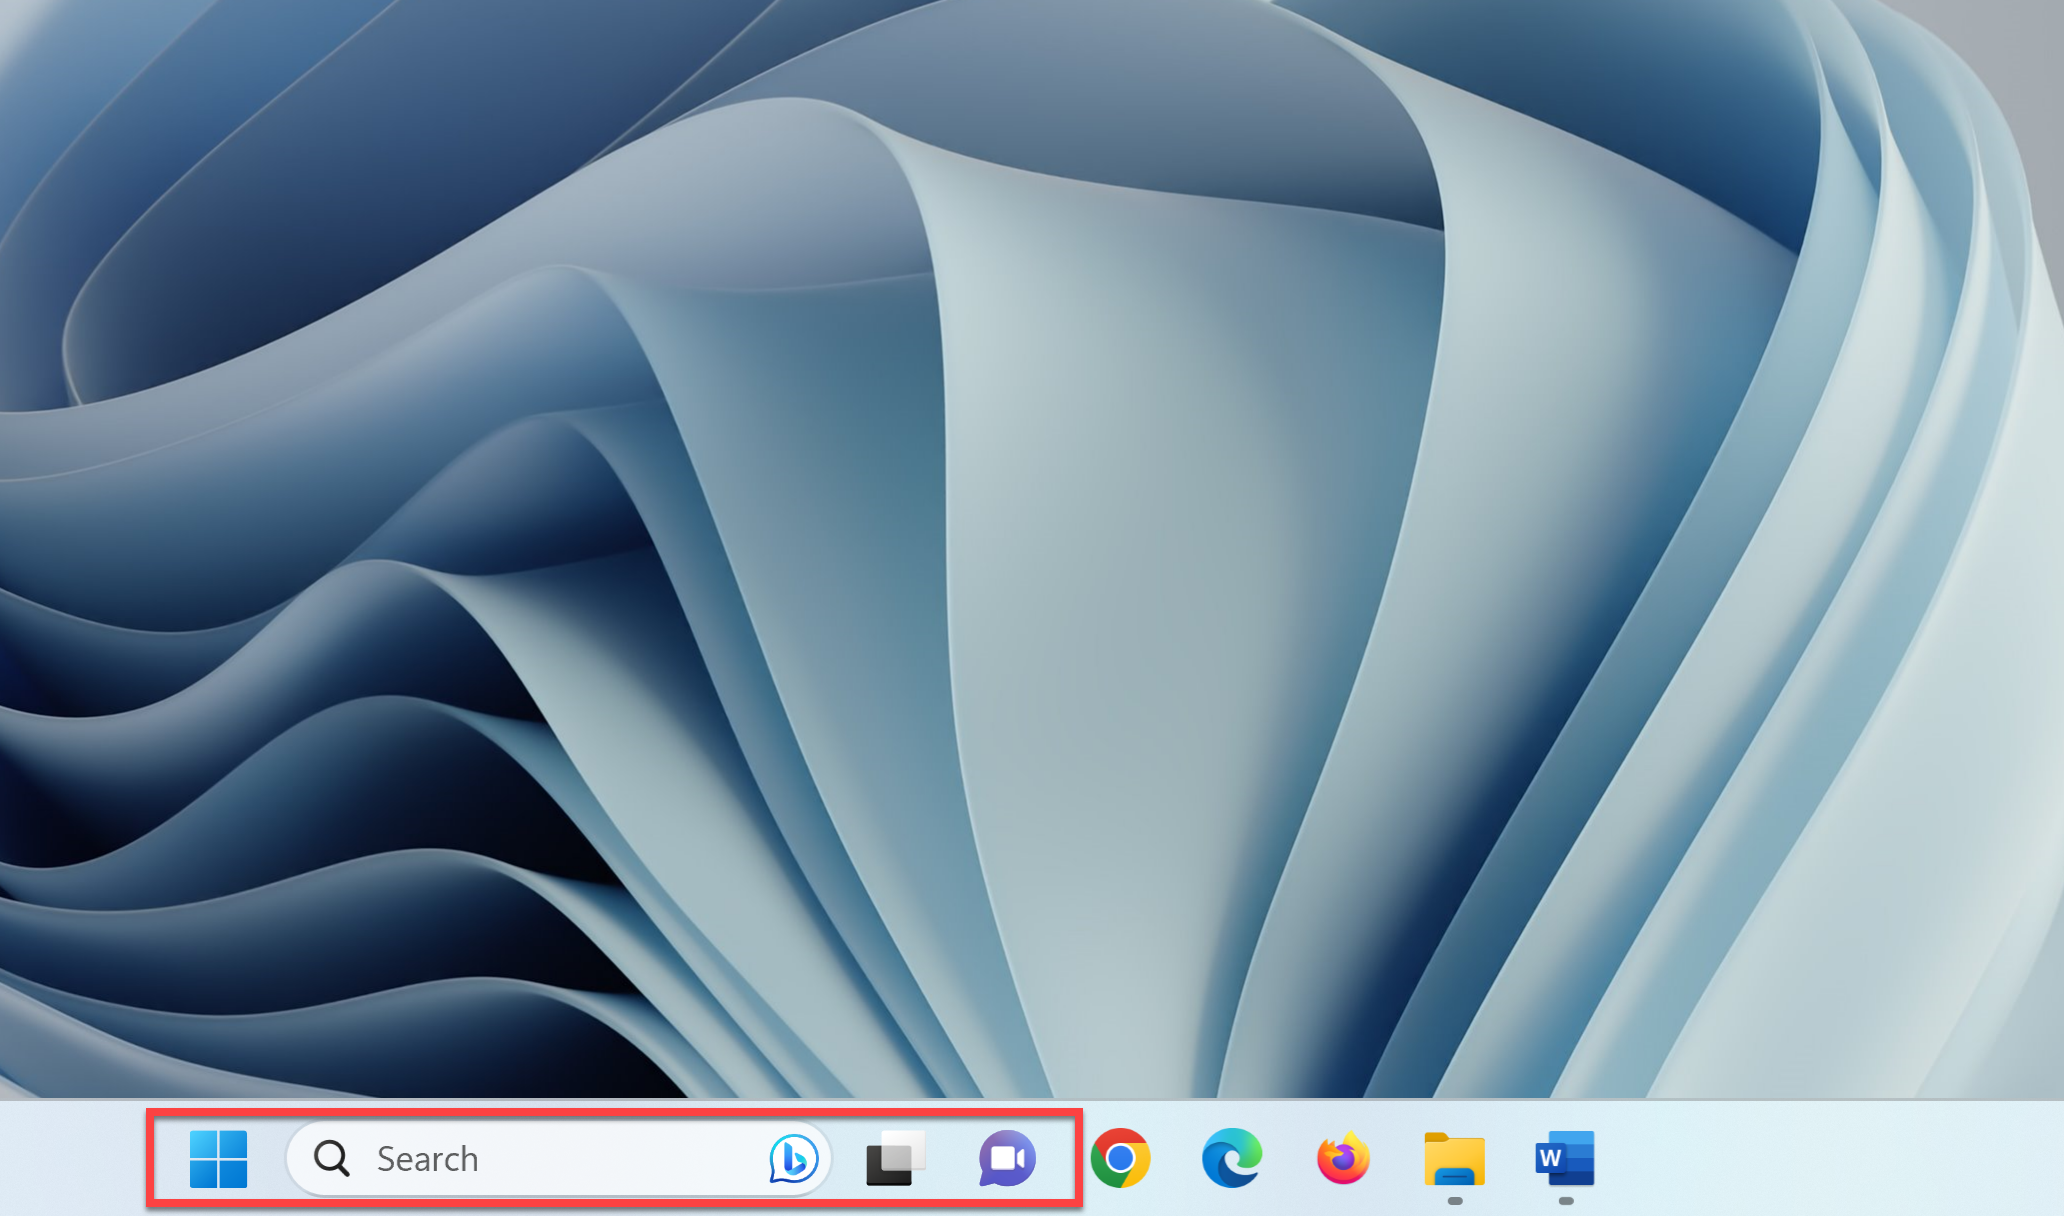
Many of the buttons are centered and clustered together. There are a couple of ways you can navigate through the Windows user interface to move to the Taskbar:
A. By pressing WINDOWS key+D to move to the Windows Desktop, followed by pressing the TAB or SHIFT+TAB key repeatedly. This moves focus forward or backward through the Windows interface.
or
B. By pressing WINDOWS key+T to move directly to the Taskbar.
- Let us use the latter method for now, since accessing the Taskbar with the keystroke is the fastest way to move focus there. Press WINDOWS key+T to move focus to the Taskbar.
NOTE: The Taskbar in Windows extends all the way across the screen along the bottom. Many times, we refer to different individual areas there such as the Start button and the System Tray, but they are all part of the Taskbar.

Focus moved to the first icon I have custom pinned to the Taskbar, Google Chrome.
- Press RIGHT ARROW to move through the other icons you may have pinned here. Focus also moves through any icons for currently running apps if there are any. JAWS identifies them as “running window” buttons. You may also find other apps pinned there by the operating system or computer manufacturers, for example, File Explorer, Microsoft Edge, etc. After pressing the RIGHT ARROW repeatedly, focus wraps back around to the first icon you heard, in my case, the icon for Google Chrome. You may also use LEFT ARROW to move backwards through these pinned items. We cover pinning and arranging the icons on the Taskbar in lesson six, the next lesson in the series after this one.
- To the left of these Taskbar icons are the icons for Search, Task View, Chat, and the Start button. The Widgets button in later Windows 11 versions is on the left side of the Taskbar now. Press SHIFT+TAB to move to the left through these icons until focus reaches the Start button, and then stop there.

If you continue pressing SHIFT+TAB, focus moves to the Widgets button on the far left of the Taskbar and then continues backward through the desktop, System Tray, and eventually wraps back around to the first pinned item focus moved to when you pressed WINDOWS key+T, in my case, the button for Chrome. Pressing TAB or SHIFT+TAB from the starting point after pressing WINDOWS key+T moves focus forward or backward through the following areas:
- Taskbar – These are the icons custom pinned by you, those for any currently running apps, and any added there by the Windows install or your computer manufacturer
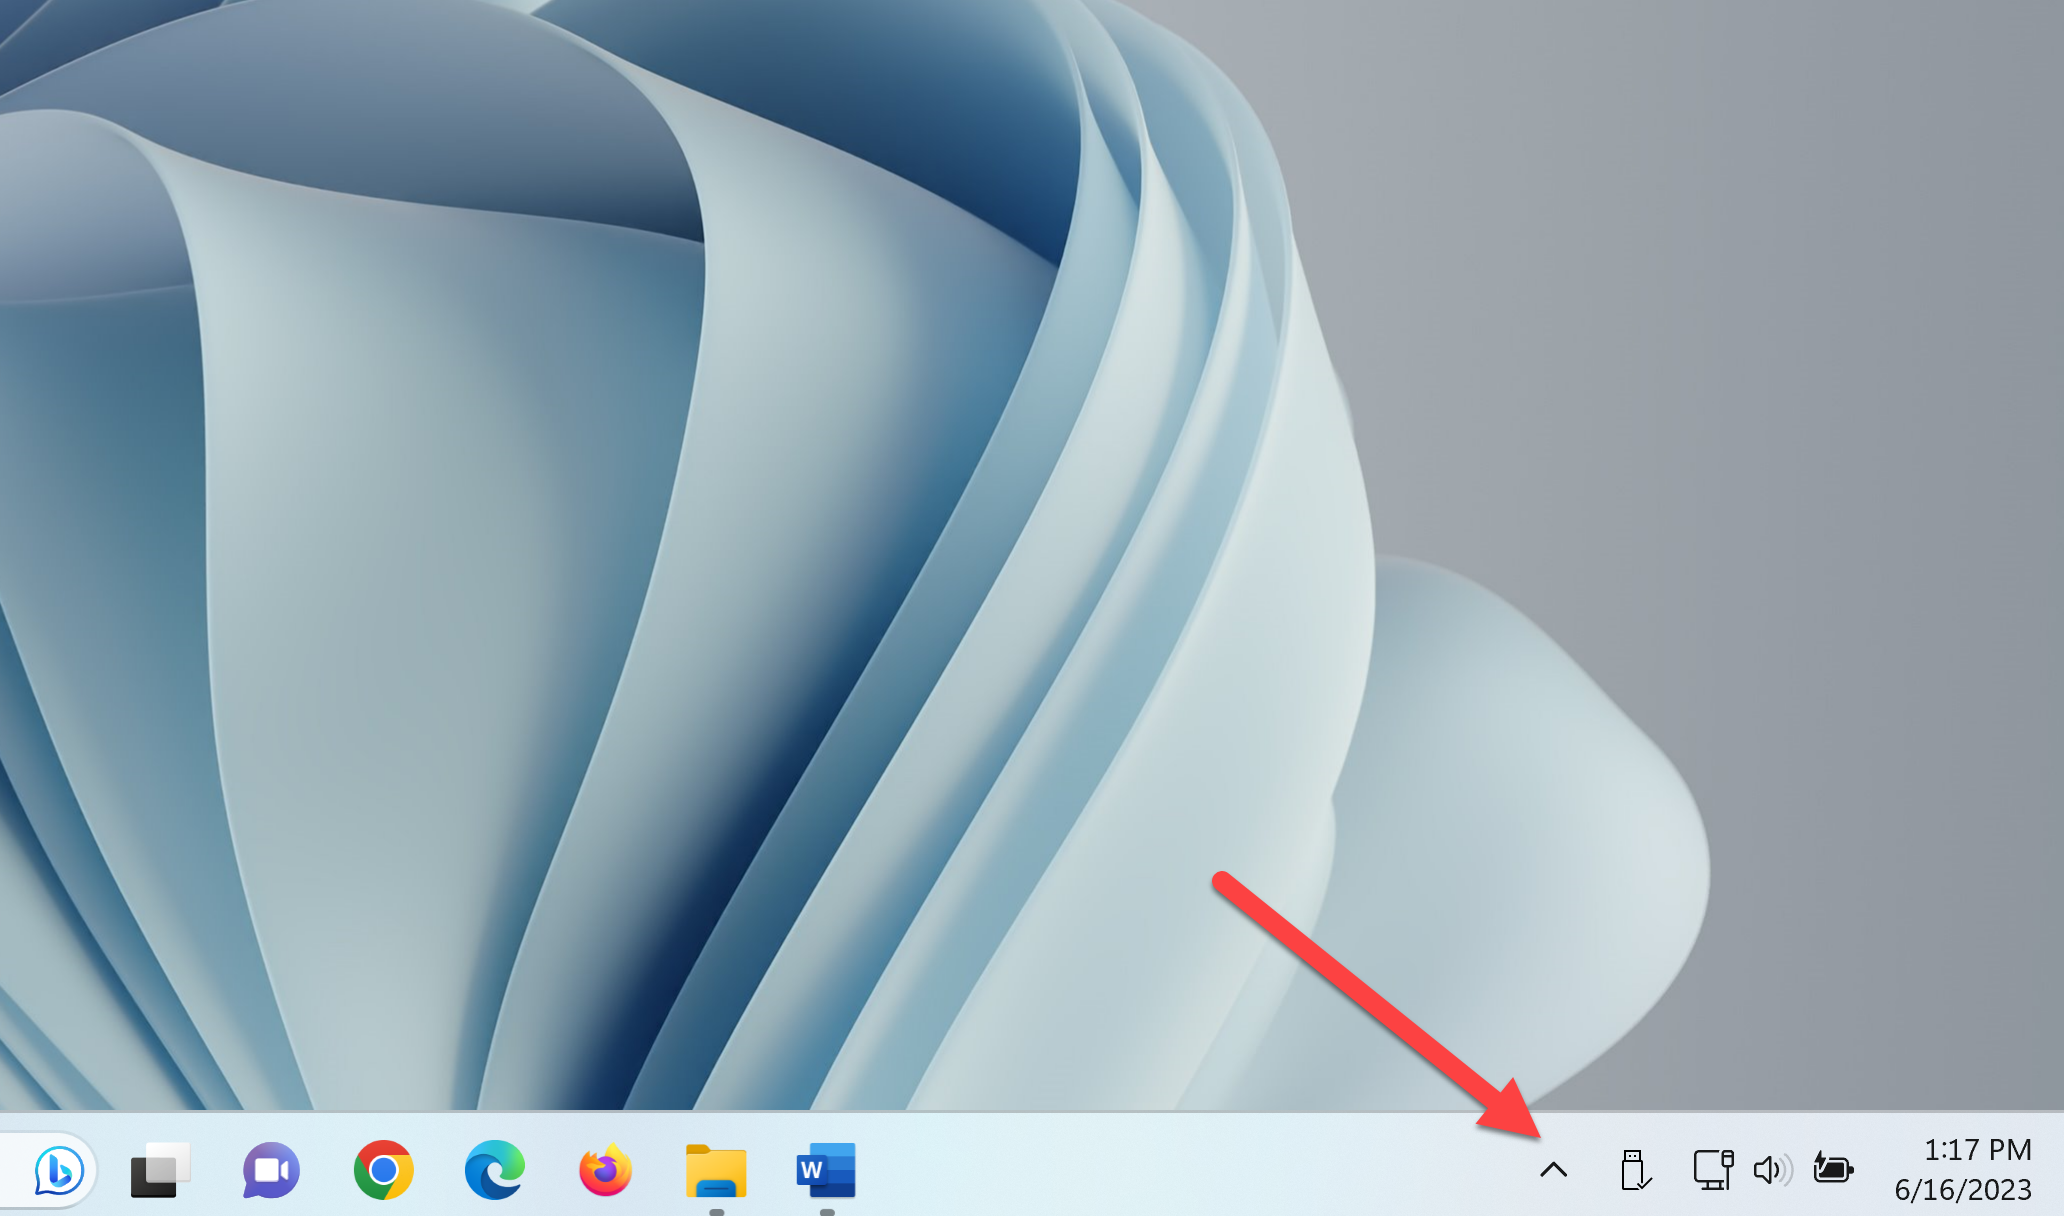
- The Show Hidden Icons button and Taskbar corner – This has the icons for Internet access and Speakers/Headphones, and any other System Tray app icons you have elected to have appear there when those apps run.
- Desktop
- Widgets button
- Start button, and going from left to right, the
- Search button
- Task View button
- Chat button
- And back to the Taskbar icons pinned by you again
The Taskbar Corner Overflow Button and System Tray
- For now, make sure focus is on the Taskbar by pressing WINDOWS key+T if needed. Then press TAB to move to the Show Hidden Icons button. This is called the Taskbar corner. Some of you may have additional System Tray icons here depending on your computer and configuration. For example, on my computer there is an icon for battery status, since I am using a laptop. System Tray icons that you do not specifically choose to appear here are hidden in the overflow area accessed by pressing the Show Hidden Icons button.

- Move to the buttons on the right by pressing RIGHT ARROW. The last thing I heard on my computer is the Show Desktop button, which performs the same function as pressing WINDOWS key+D. This button is not shown visually unless one hovers a mouse over the right end of the Taskbar. Even then, it is only several pixels high and one or two pixels wide and is very difficult to see.
- Press RIGHT ARROW once more and focus wraps back to the Show Hidden Icons button.
- Press SPACEBAR to open the Show Hidden Icons button. On my computer, focus moves to the Skype button.
![]()
As you press the ARROW keys, JAWS reads the name of buttons for some of the apps installed on your computer:
- When you finish exploring press ESC. Focus returns to the Show Hidden Icons button.
- Press TAB once more. Focus moves to the Desktop list view. You may continue pressing TAB or SHIFT+TAB to move forward or backward through the main parts of the Windows interface.
Thank you for joining me in this lesson on desktop navigation in Windows 11 using the keyboard and JAWS.
Up next, pin and arrange apps on the Taskbar.

