
Permanently Unhide the “Safely Remove Hardware and Eject Media” Icon in Windows 11
Resources
ZIP file of all resources for the lesson (alternatively, download individual files below)
The Taskbar corner in Windows 11 has been condensed to a “Show Hidden Icons” button along with a minimal number of other icons. While this looks great and is less cluttered, some of the icons for apps you may often use could be hidden within the Show Hidden Icons area when you need them. This is true of the “Safely Remove Hardware and Eject Media” icon.
![]()
Here’s how to find it and fix it in Windows 11:
- Open the Windows Start menu by pressing the WINDOWS Key. Focus is in the search edit box.
- Type the words “taskbar settings” in the search edit box, and then press ENTER. The Windows Settings app opens to the taskbar settings. If this step does not work for you, open the Windows Settings app by pressing WINDOWS Key+I. Then move to Personalization by pressing DOWN ARROW, followed by ENTER. Finally, choose Taskbar in the list of settings on the right side of the screen.
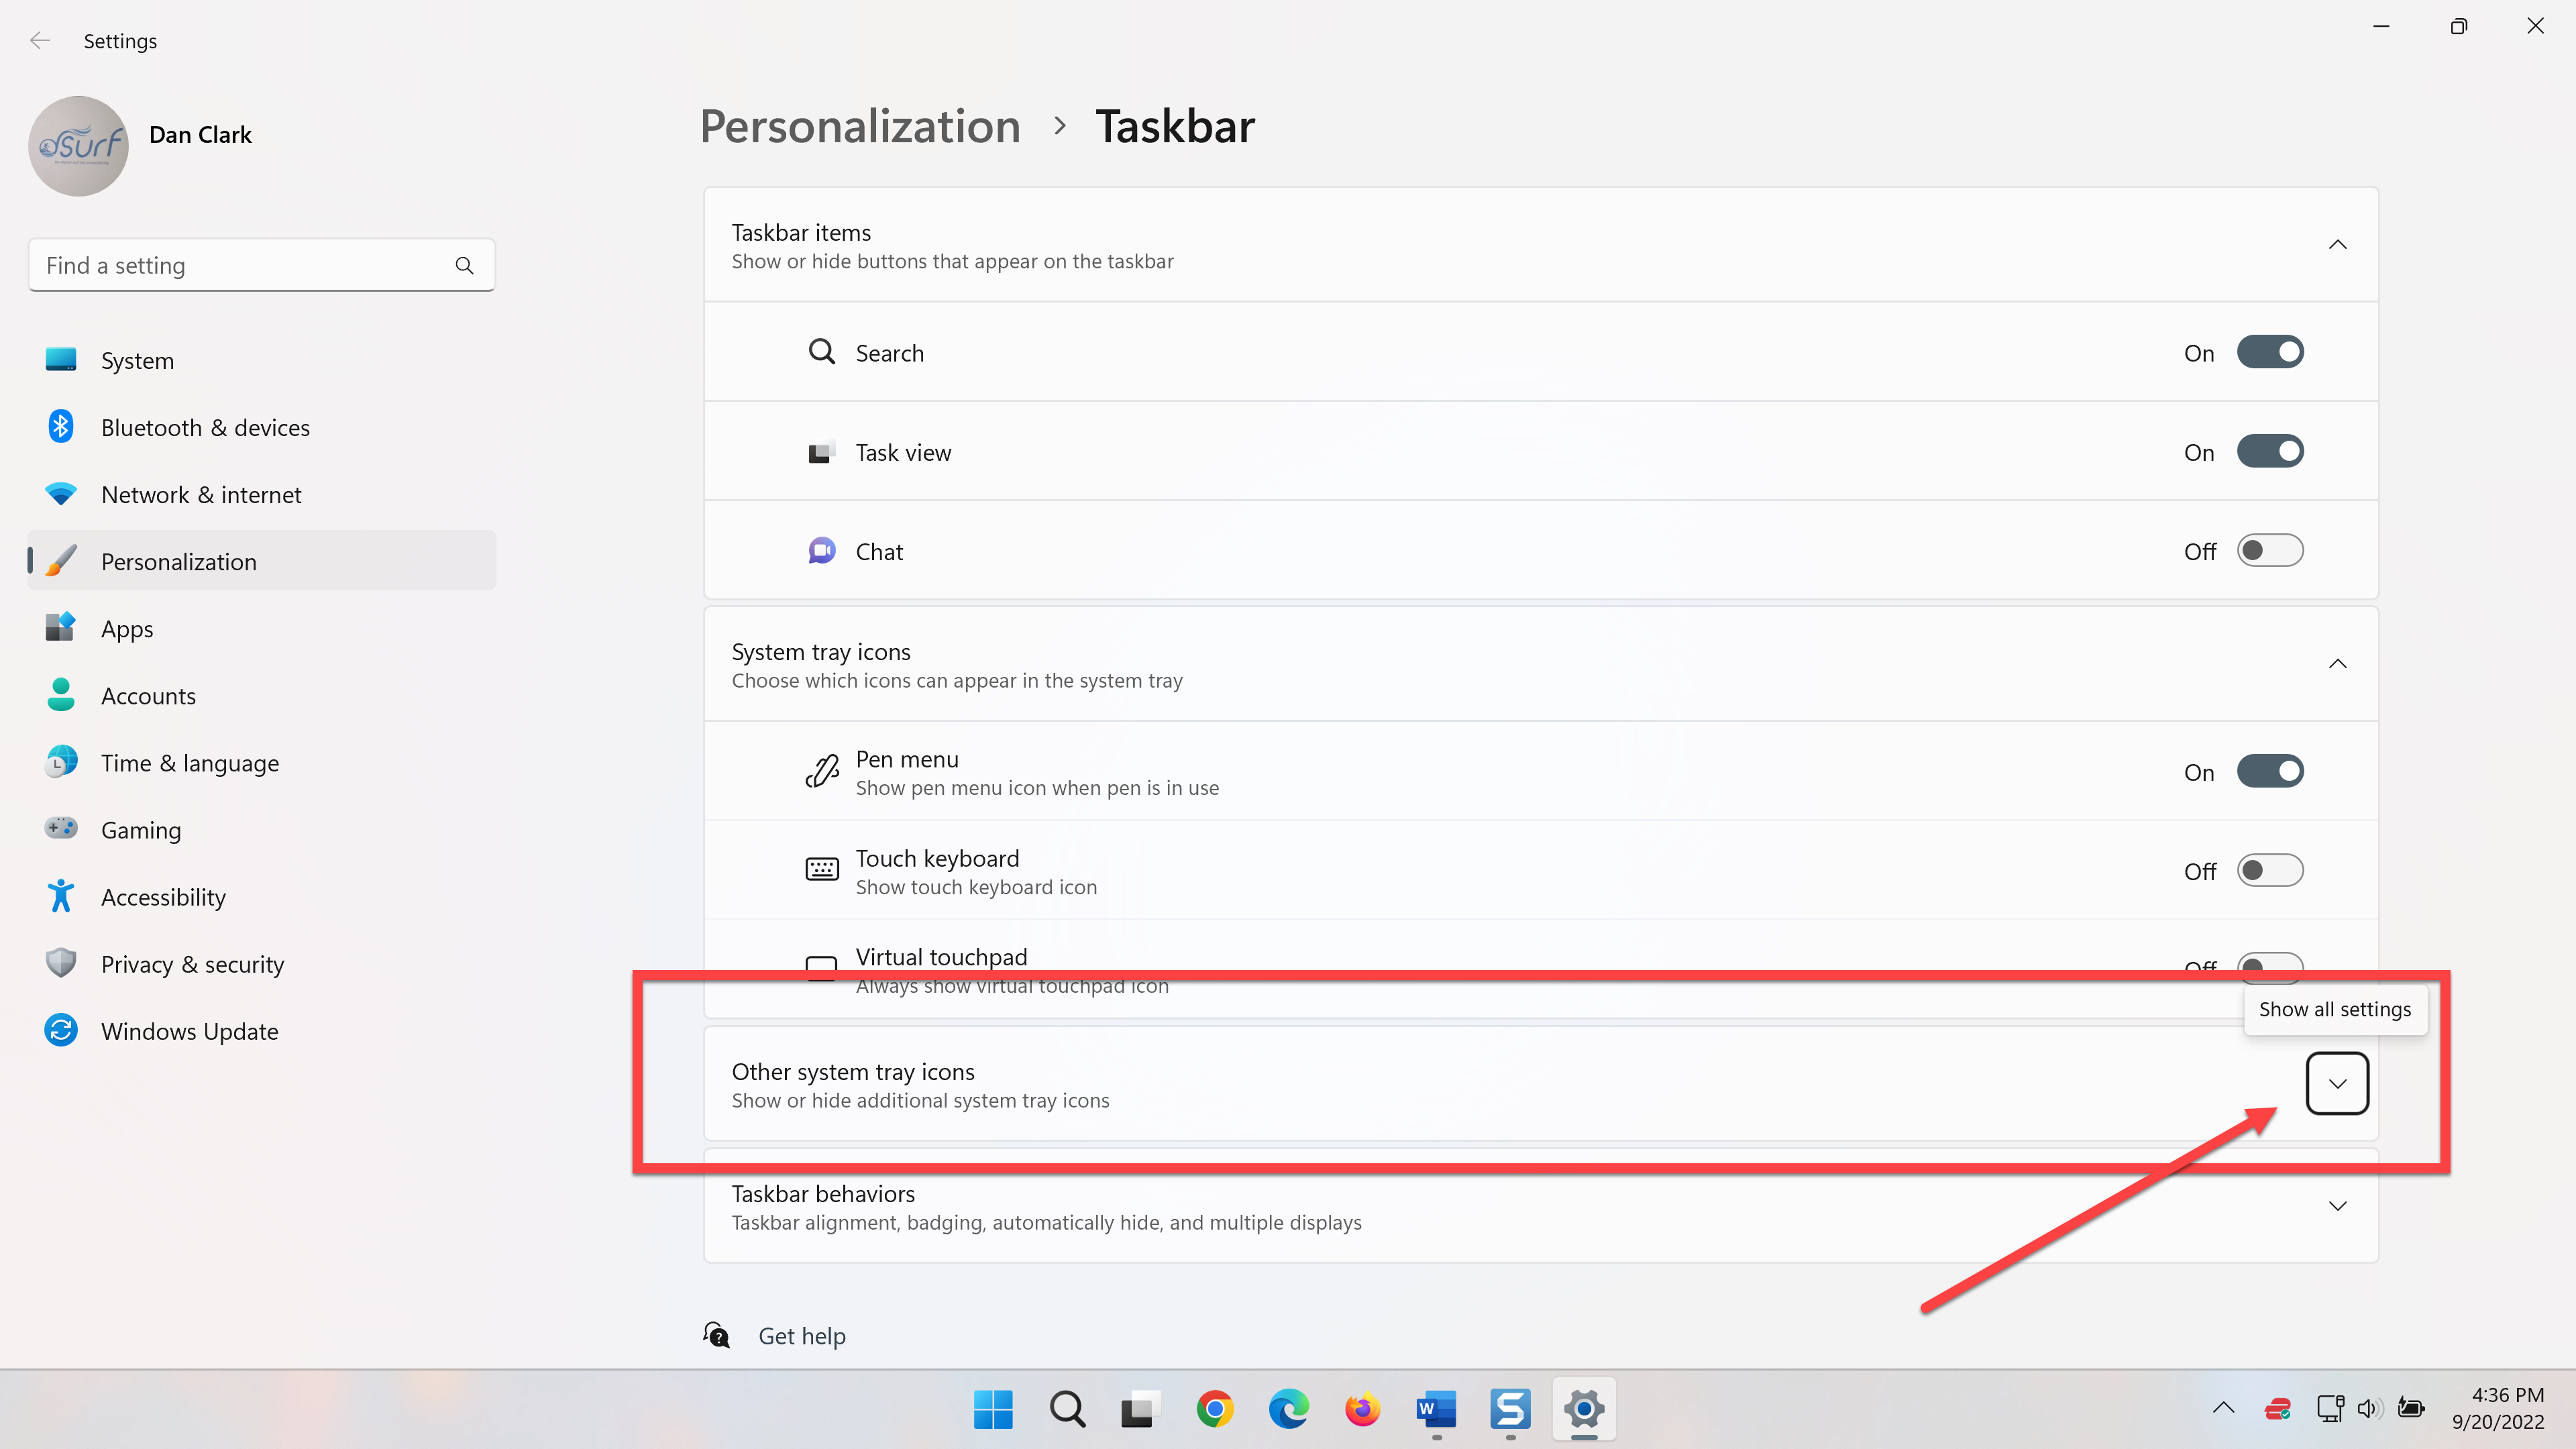
- Move to the “Other system tray icons, Show all Settings button” by pressing TAB several times, and then activate it with a left mouse click or the SPACEBAR. A vertical list of available icons is now available. Each one has an On/Off button to enable it to be shown permanently or not.
![]()
- Move to the list of available icons on your PC by pressing TAB, and then press DOWN ARROW to find the “Safely Remove Hardware and Eject Media” icon.
Author’s note: If you have never used a thumb drive or removable media in Windows 11 the “Safely Remove” icon may not be initially listed. If not, plug in a thumb drive for this lesson and you should find it in the list. You do NOT need to leave the thumb drive permanently inserted once this lesson is finished.
- Move to the On/Off button by pressing TAB, and then activate it with a left mouse click or the SPACEBAR.

- Close the Settings app by pressing ALT+F4. Changes are saved automatically.
The “safely remove” icon now appears permanently in the taskbar system tray corner where it can be accessed more quickly and easily.