
Snap Layouts, Snap Assist, and Snap Groups
Lesson 10
Resources
ZIP file of all resources for lesson 10 (alternatively, download individual files below)
Back to Windows 11 Training Page
Objectives
By the end of this lesson you will understand, be able to discuss, and/or perform the following tasks as they relate to using snap layouts, snap assist, and snap groups in Windows 11:
- Describe how the snap layout grid and snap groups appear visually to others
- The concept behind the use of snap groups
- Use snap assist to create groups more easily
- Describe at least two of the more commonly used snap layouts
- Use a mouse or keyboard to add apps to a snap group
- Use a mouse or keyboard to explore and use the task switcher lists for snap groups on the Taskbar
Introduction
Snap layouts allow you to organize apps and windows by grouping them together side-by-side or in other arrangements visually on the screen in snap groups. Keyboard users may use the keystrokes described later in this lesson to create snap groups instead of trying to use the mouse.
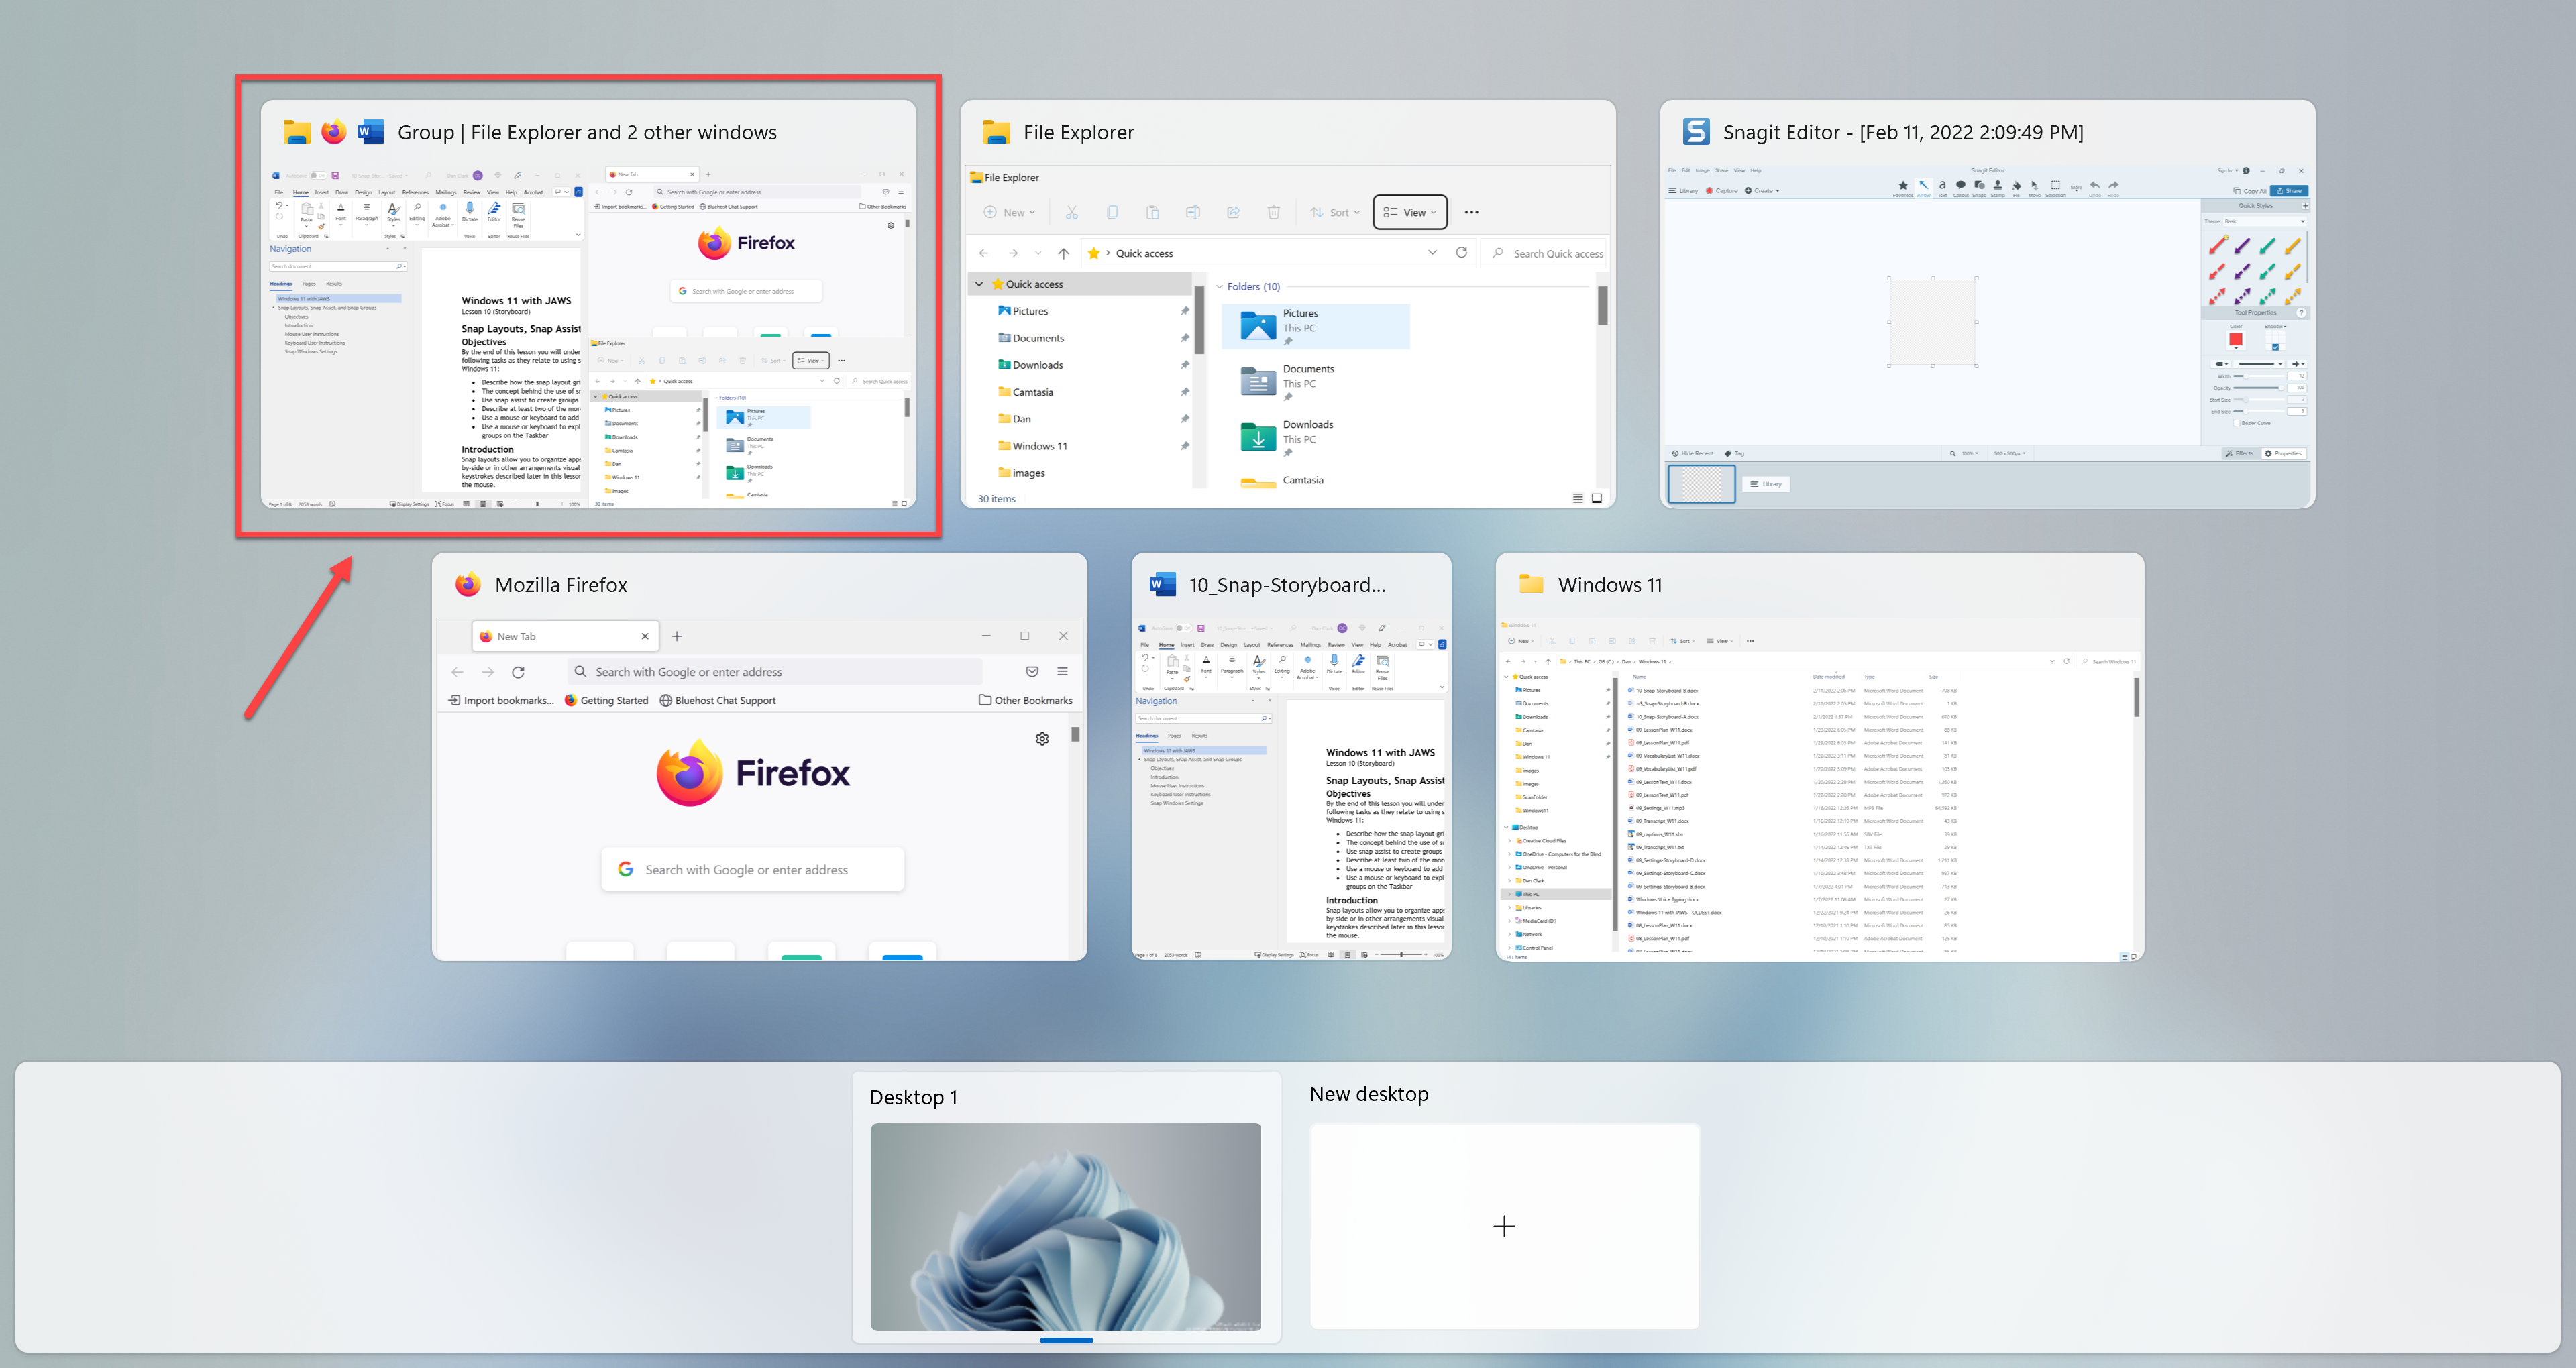
Microsoft have added snap groups to both the task switching window accessed by pressing alt+tab
as well as the task view window accessed by pressing Windows key+tab or by left-clicking the task view button on the Taskbar.
You can easily change apps in any snap group window. Just open a new window or app, open the snap layout grid from the maximize or restore button of the new app, and then choose a spot in the snap grid of the current snap group to place the new app.
You can remove apps or windows from snap groups by simply maximizing them.
Snap layouts are customized to fit the size of your PC screen. Up to six different layout grids may be available on some large screens.
Mouse User Instructions
For this lesson, I have Microsoft Word open in one window, the Firefox browser open in a second window, and File Explorer open in a third window.
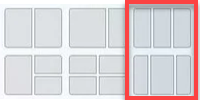
- If you are a mouse user, hover your mouse over a window’s maximize or restore button (depending on the current window state) to view a snap layout of grids showing thumbnail arrangements of windows in various patterns, including two windows side-by-side, three or four windows in a layout, and more.
On my PC there are four different snap layouts available.
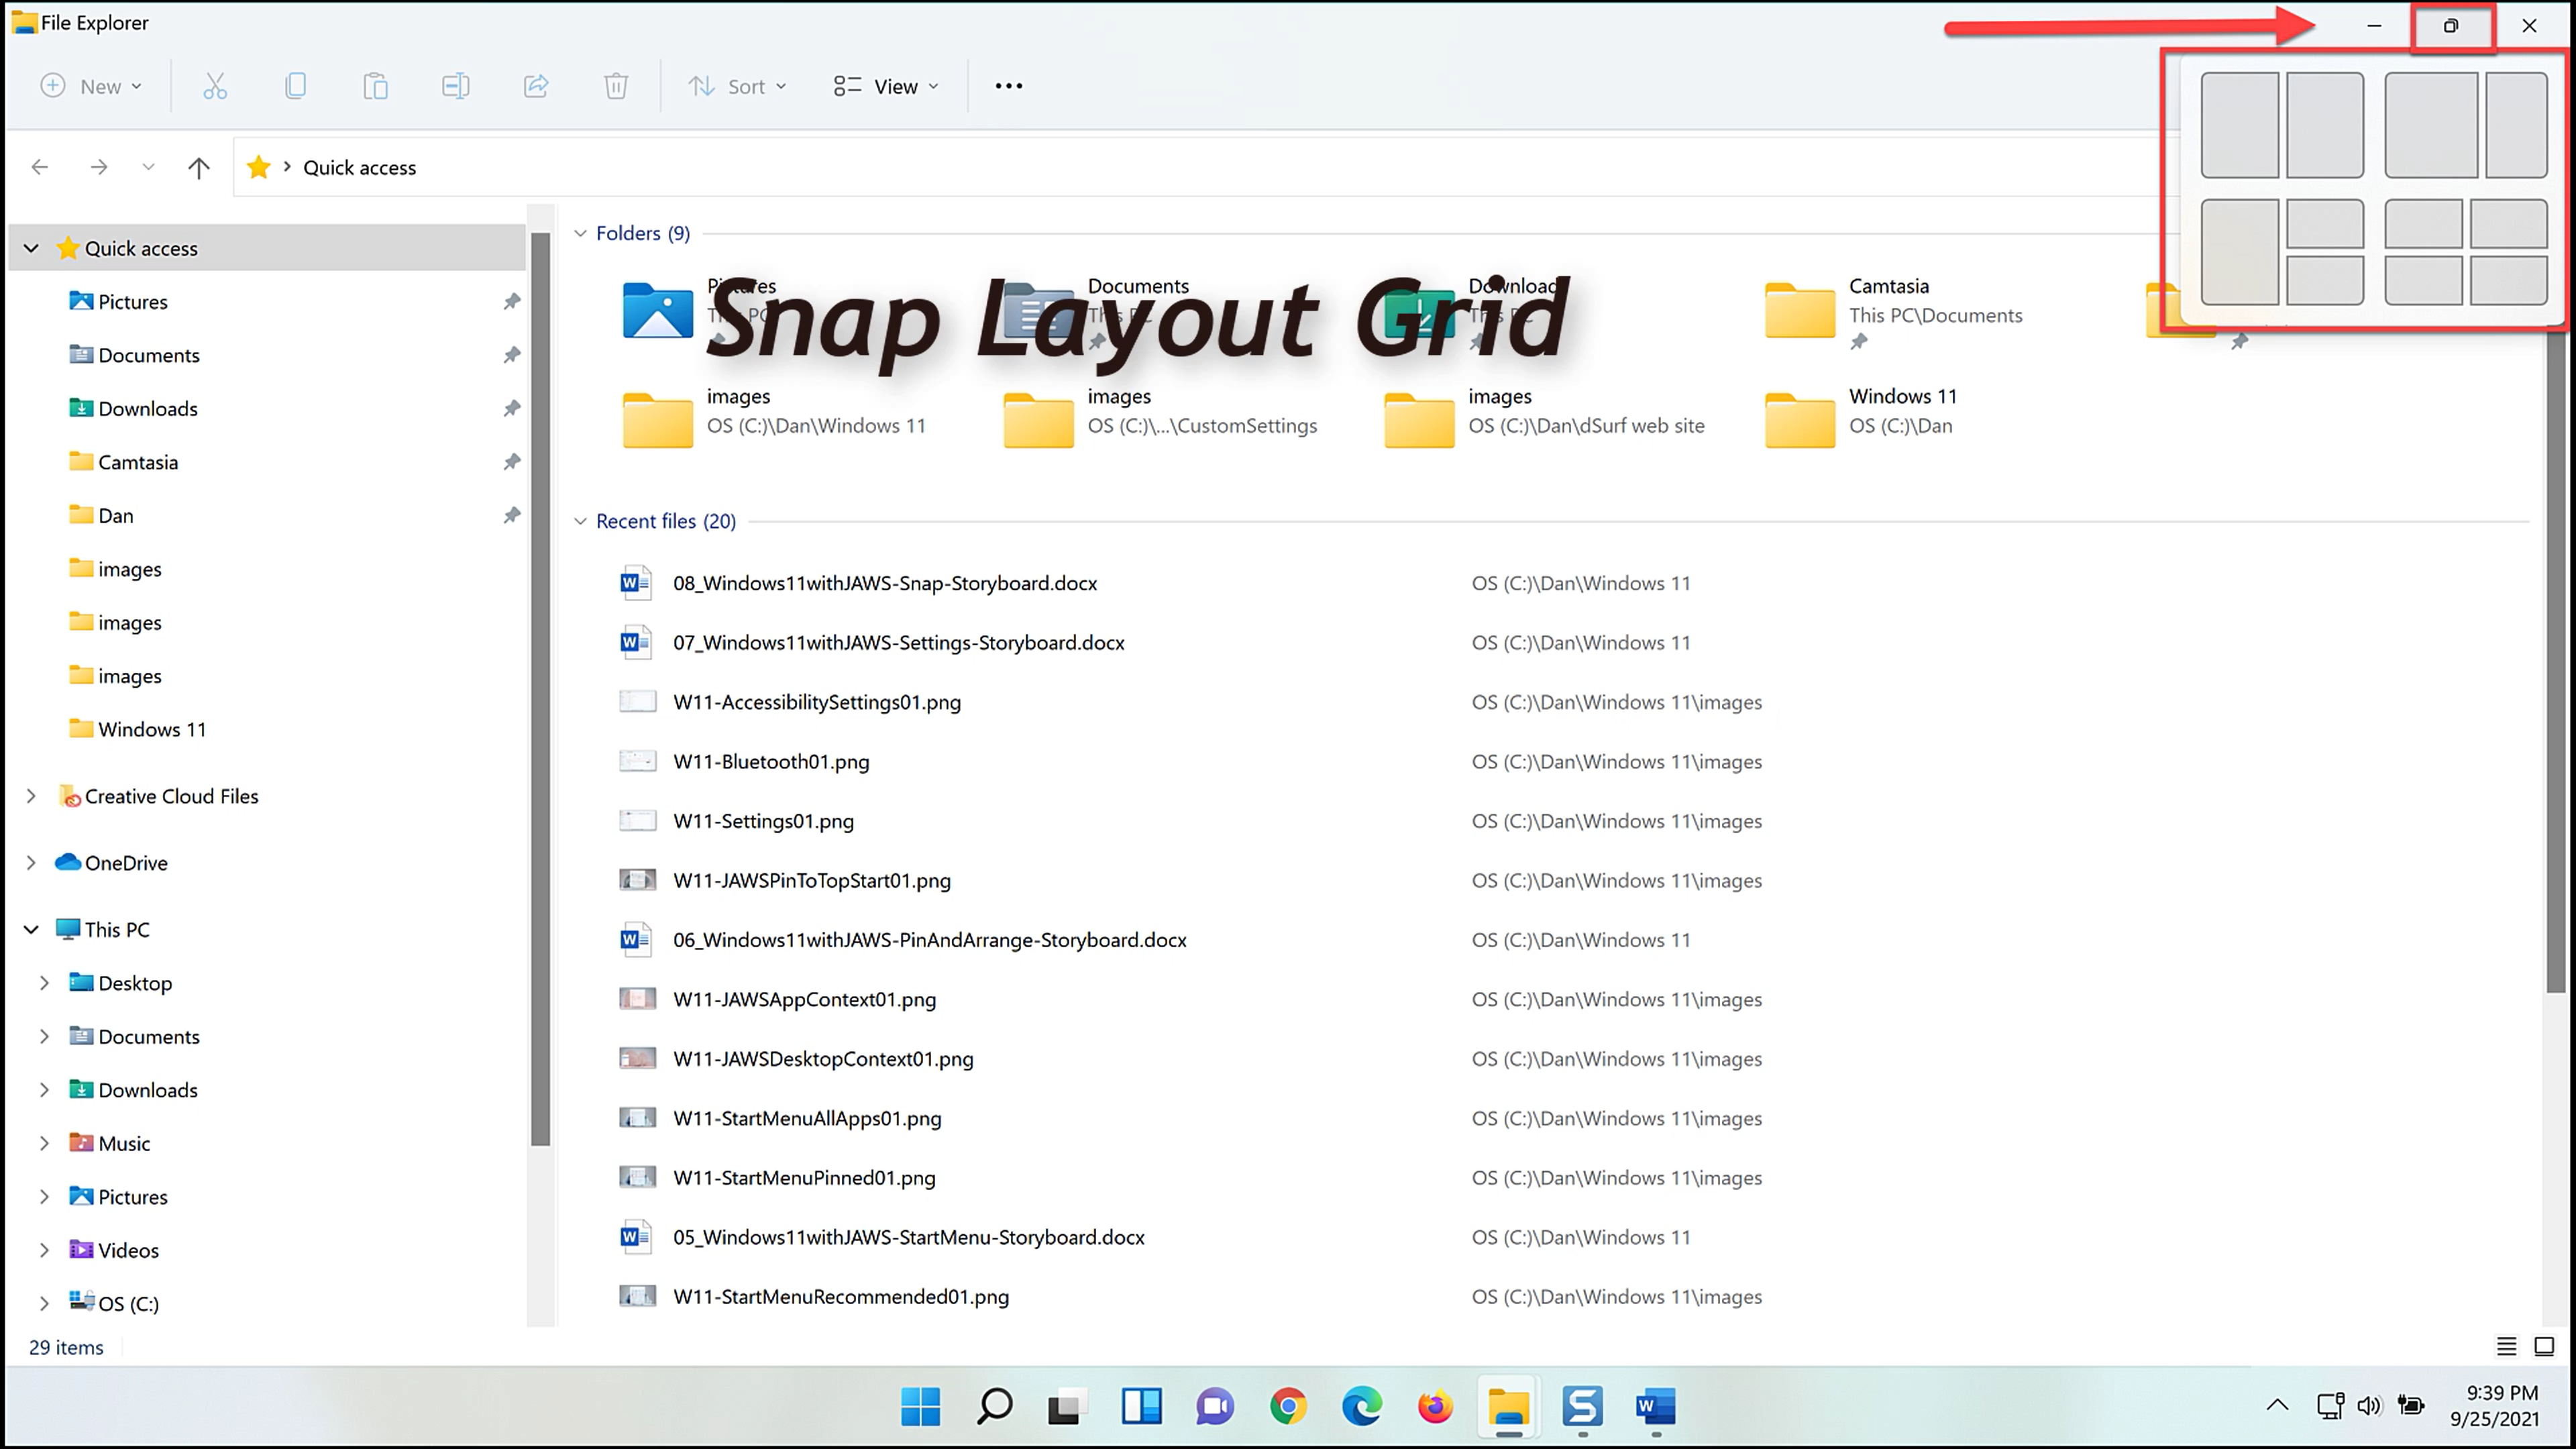
- Hover the mouse pointer over the Microsoft Word restore button. The snap layout grids available to choose from appear in the top right corner of the screen.
Some of the choices you find in the snap layout grid may include the following:
- 2-window layout, with the left half and right half each at 50% wide and 100% high
- 2-window layout, with the left half at 60% wide and 100% high and the right half at 40% wide and 100% high
- 3-window layout, with the left half at 50% wide and 100% high and the right half split into top and bottom quarters of the screen
- 4-window layout, with four quarters of the screen each 50% wide and 50% high
On larger monitors two more layouts may be available:
- 3-window layout, with three equal sections one-third wide and 100% high
- 3-window layout, with the middle section about 40% wide and 100% high and the left and right sides about 30% wide and 100% high
- Click on a zone in one of the layouts to snap the current window to that part of the screen. Left-click the larger section on the left of the 3-window snap layout grid. Microsoft Word is now shown on the left half of my screen from top to bottom.
By default, snap assist shows all running apps that are available to snap to the next zone of the two zones I have remaining. They are shown in the top right zone.
- Left-click the Firefox app in the top right zone. Snap assist now shows the other available apps you can choose to snap to the remaining zone for the bottom right side of the screen.
- Left-click the File Explorer app in the bottom right zone. The snap group is now completed. On my PC the left half of the screen from top to bottom shows Microsoft Word. The top right quarter of the screen shows Firefox, and the bottom right quarter of the screen shows File Explorer.
Once a group is created, hover your mouse over the items in the Taskbar to switch to individual apps or the whole group at once.
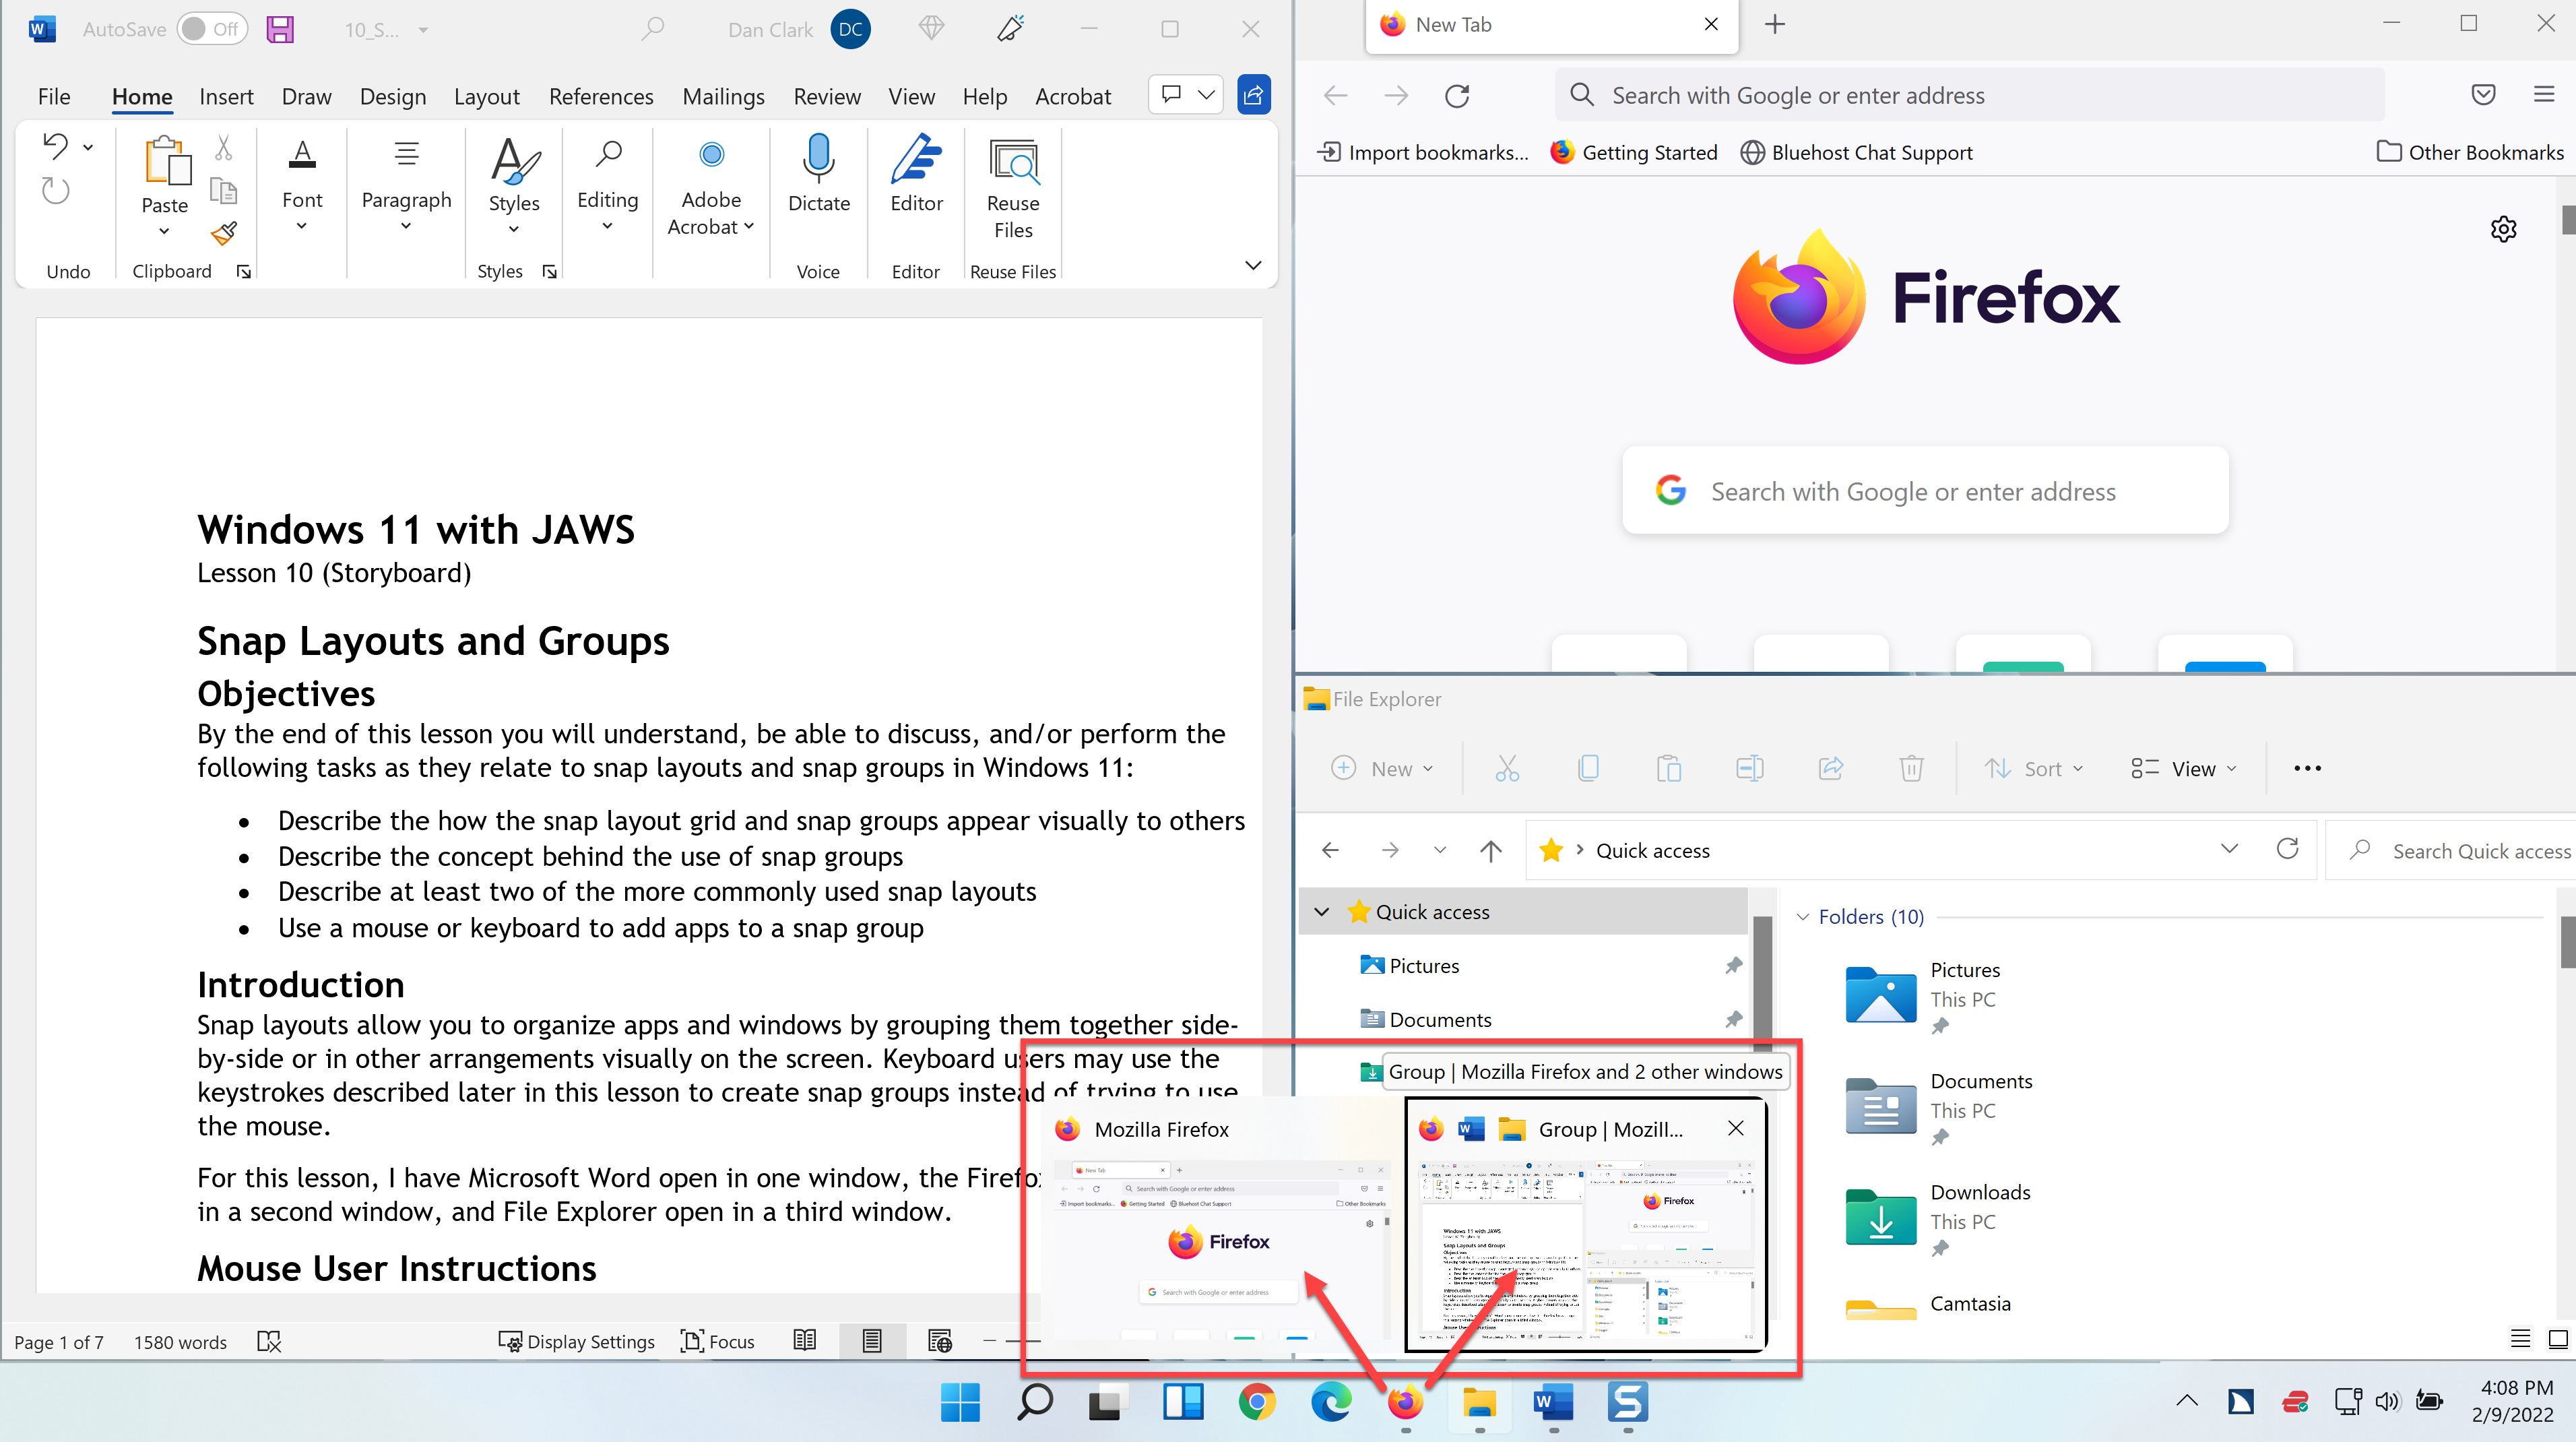
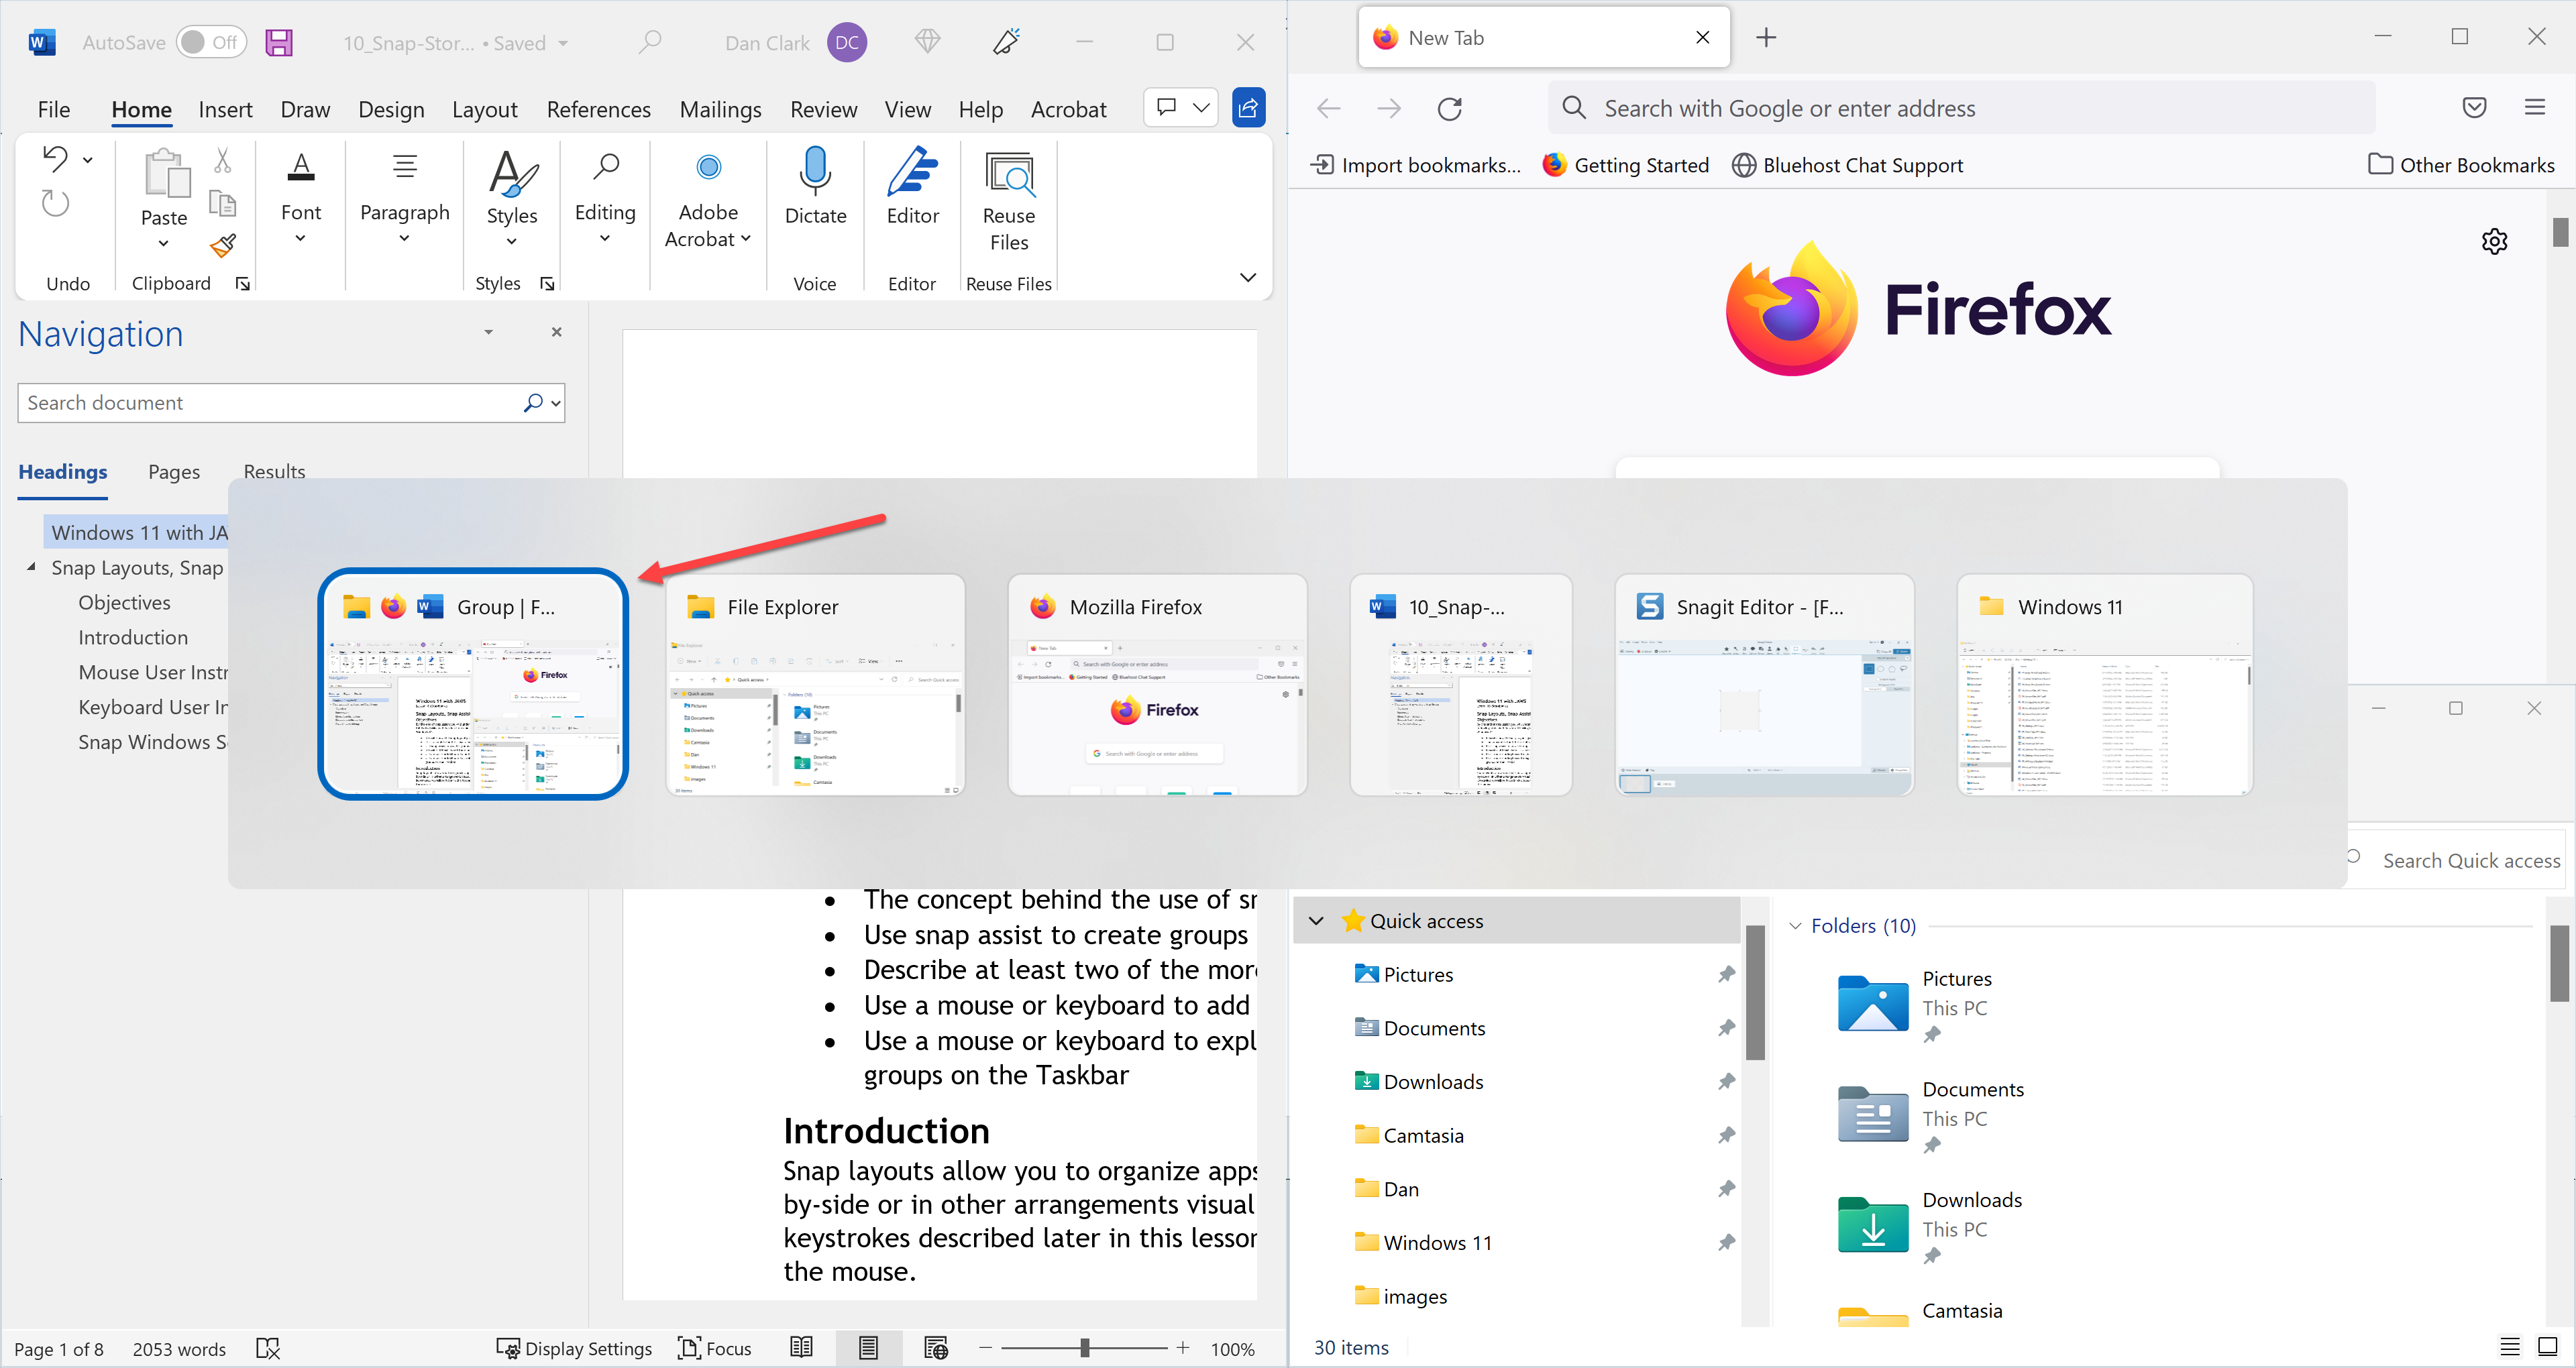
- Hover the mouse pointer over the Taskbar icons at the bottom center of the page to look for a task switcher list showing the current snap group. There it is. I notice the tool tip label reads “Group | Mozilla Firefox and 2 other windows.” As you hover the mouse pointer over the individual app in the task switcher list, the app appears on the screen. Similarly, hovering the mouse pointer over the group in the task switcher list displays the entire group visually on screen.
This gives one the ability to open even more apps to work with and then switch back to this same snap group instantly.
- Open a context menu for the snap group by moving focus to the task switcher list, and then pressing the application key, or by right-clicking one of the items in the task switcher list on the Taskbar with the mouse pointer.
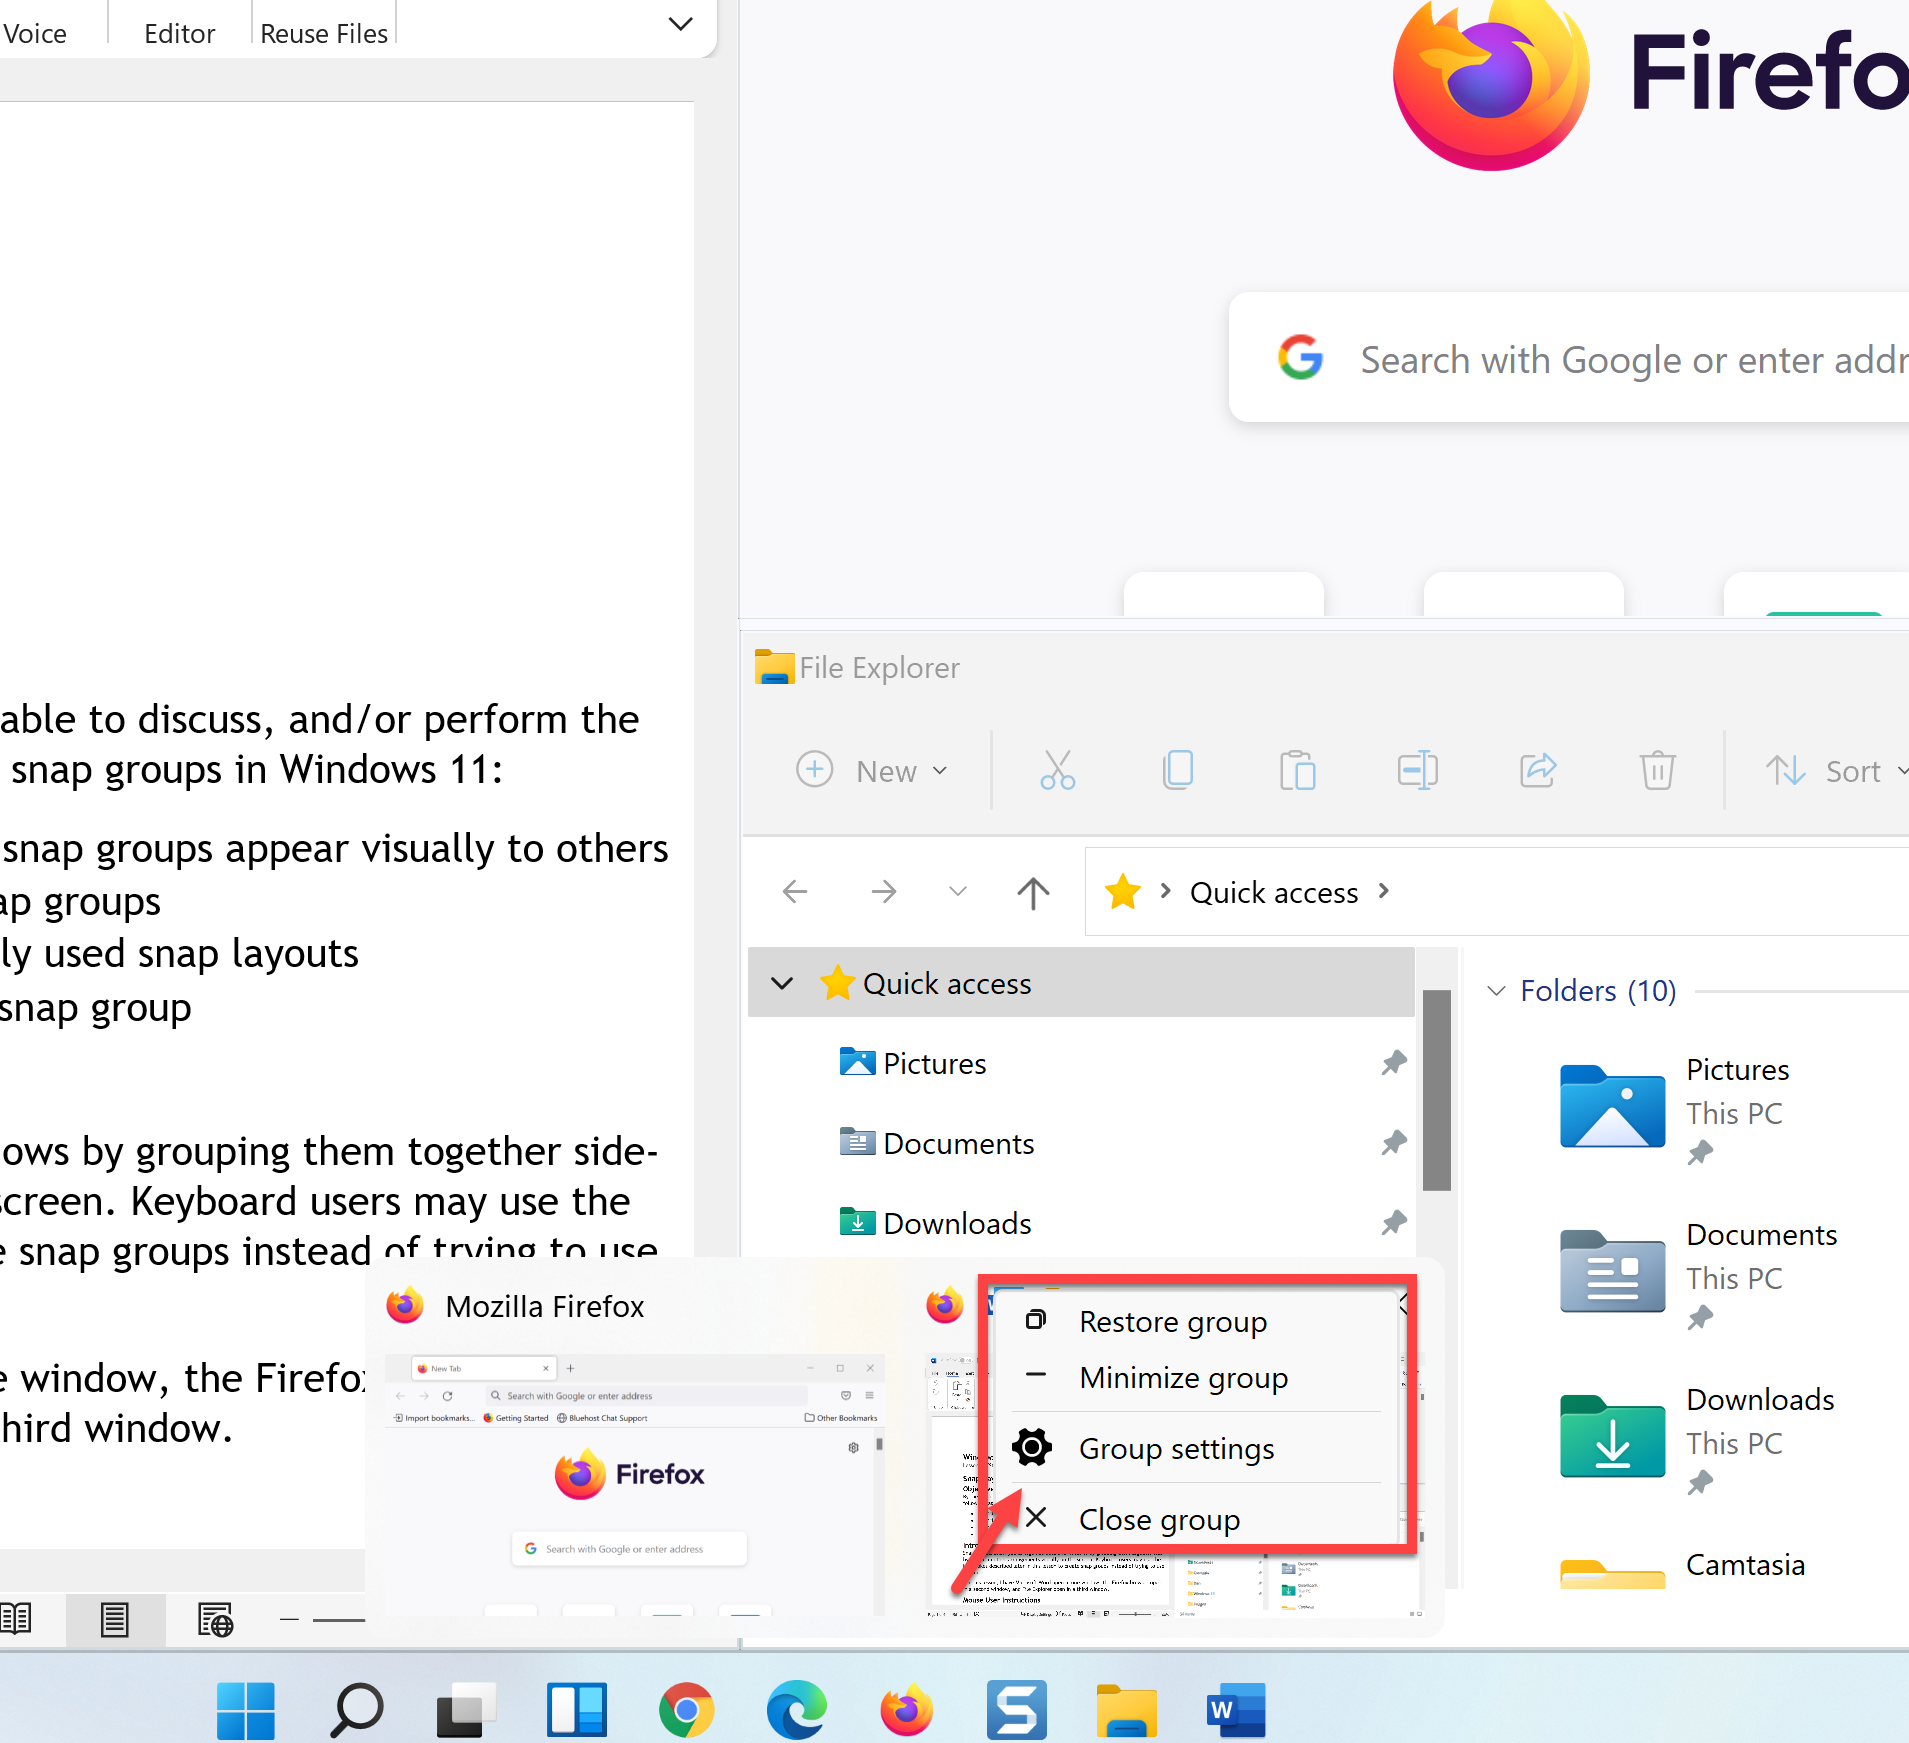
Items in the context menu for snap groups include
- Restore group
- Minimize group
- Group settings
- Close group
You can remove apps or windows from snap groups by simply maximizing them. Do that now before moving on to the next part of the lesson.
Keyboard User Instructions
Keyboard users can use the same keystrokes from earlier versions of snap in Windows such as the Windows key and arrow keys instead of the snap layout grid. For example, you may snap the current window to the left by using the keystroke WINDOWS key+LEFT ARROW, and then snap another window to the right using the WINDOWS key+RIGHT ARROW. This is fine for showing two windows simultaneously, but what if you want to show three or four windows on the screen at the same time? You can do this with multiple steps using only the keyboard as described, but it is much easier to accomplish using the new snap layouts grid in Windows 11.
To open the snap layouts grid using the keyboard, press WINDOWS key+Z. The snap layout grid appears floating below the maximize or restore button for the currently focused app.
For this part of the lesson, I have Microsoft Word open in one window, the Firefox browser open in a second window, and File Explorer open in a third window. If you need to open a few apps to practice with, go ahead, and do that now.
- First, press ALT+TAB to move focus to the Word document.
- Open the snap layout grid by pressing WINDOWS key+Z now.
- You can move focus into the grid of available layouts by pressing right arrow, but instead, move focus into the grid by pressing the TAB key. Then continue pressing TAB to explore the choices available. Reserve the arrow keys for exploring the available slots within each layout.
- To explore the buttons available within each layout, use the ARROW Keys. Focus is currently in the 4-window layout on my PC.
- Move back to the three-window layout by pressing SHIFT+ TAB.
- Focus is on the bottom right of the three slots available. Press LEFT ARROW to move focus to the left layout part of the grid, which is 50% wide and 100% high.
- Snap the Word window to this part of the grid by pressing ENTER.
The Microsoft Word app is now sized for the left half of the screen. Focus is in the top right corner of the screen where snap assist has displayed thumbnails of the remaining apps I can use to place in this part of the screen. I heard there are four items here, Firefox is one of the four apps I have currently running besides Word that I can use.
- Press RIGHT ARROW to explore the other apps available.
Focus wrapped back to the first item.
- I am going to press the ARROW key until I find Firefox.
- Press SPACEBAR to snap Firefox to the top right corner of the screen.
Firefox now takes up the top right quarter of the screen. Focus is in the bottom right corner of the screen where snap assist has displayed thumbnails of the remaining apps I can use to place in this part of the screen.
- Press RIGHT ARROW to select File Explorer, and then SPACEBAR to snap it to the bottom right quadrant of the screen.
The new snap group containing three apps now is created. Notice that you can still switch to any of the individual apps running in the snap group by pressing alt+tab.
- Press ALT+TAB now to move to the browser window. Notice also that as you press alt+tab, one of the items in the task switching window is the new snap group you just created.
You can minimize all apps and move focus to the Windows desktop while still maintaining the snap group.
- Move to the desktop by pressing WINDOWS key+D now.
- Open the snap group with the three apps once more by using the task switching window with ALT+TAB.
You can access the task switcher list for snap groups using the keyboard.
- Press WINDOWS key+T to move focus to the Taskbar.
- Press RIGHT or LEFT ARROW to move to any of the buttons on the Taskbar for the snap group.
- Press UP ARROW to move focus into the task switcher list.
- Press RIGHT ARROW to move to the other window here.
This performs the same action as one gets when hovering the mouse pointer over each thumbnail view.
- You can also press the application key to get the snap group context menu.
- For now, press ESC.
- When you are finished practicing close any apps you may have opened.
Snap Windows Settings
Snap windows settings can be accessed by typing the word “snap” in the Find a Setting search edit box of the Windows Settings app.
- Open the Windows Settings app by pressing WINDOWS key+I now.
- Type “snap” in the search edit box.
- Move to the first item in the search results by pressing DOWN ARROW.
- Press ENTER.
The Multitasking section of the Settings app opens on the right side of the screen. To the right of this button is another button visually indicating this item is collapsed.
- Move to the button by pressing TAB, and then expand this section by pressing SPACEBAR.
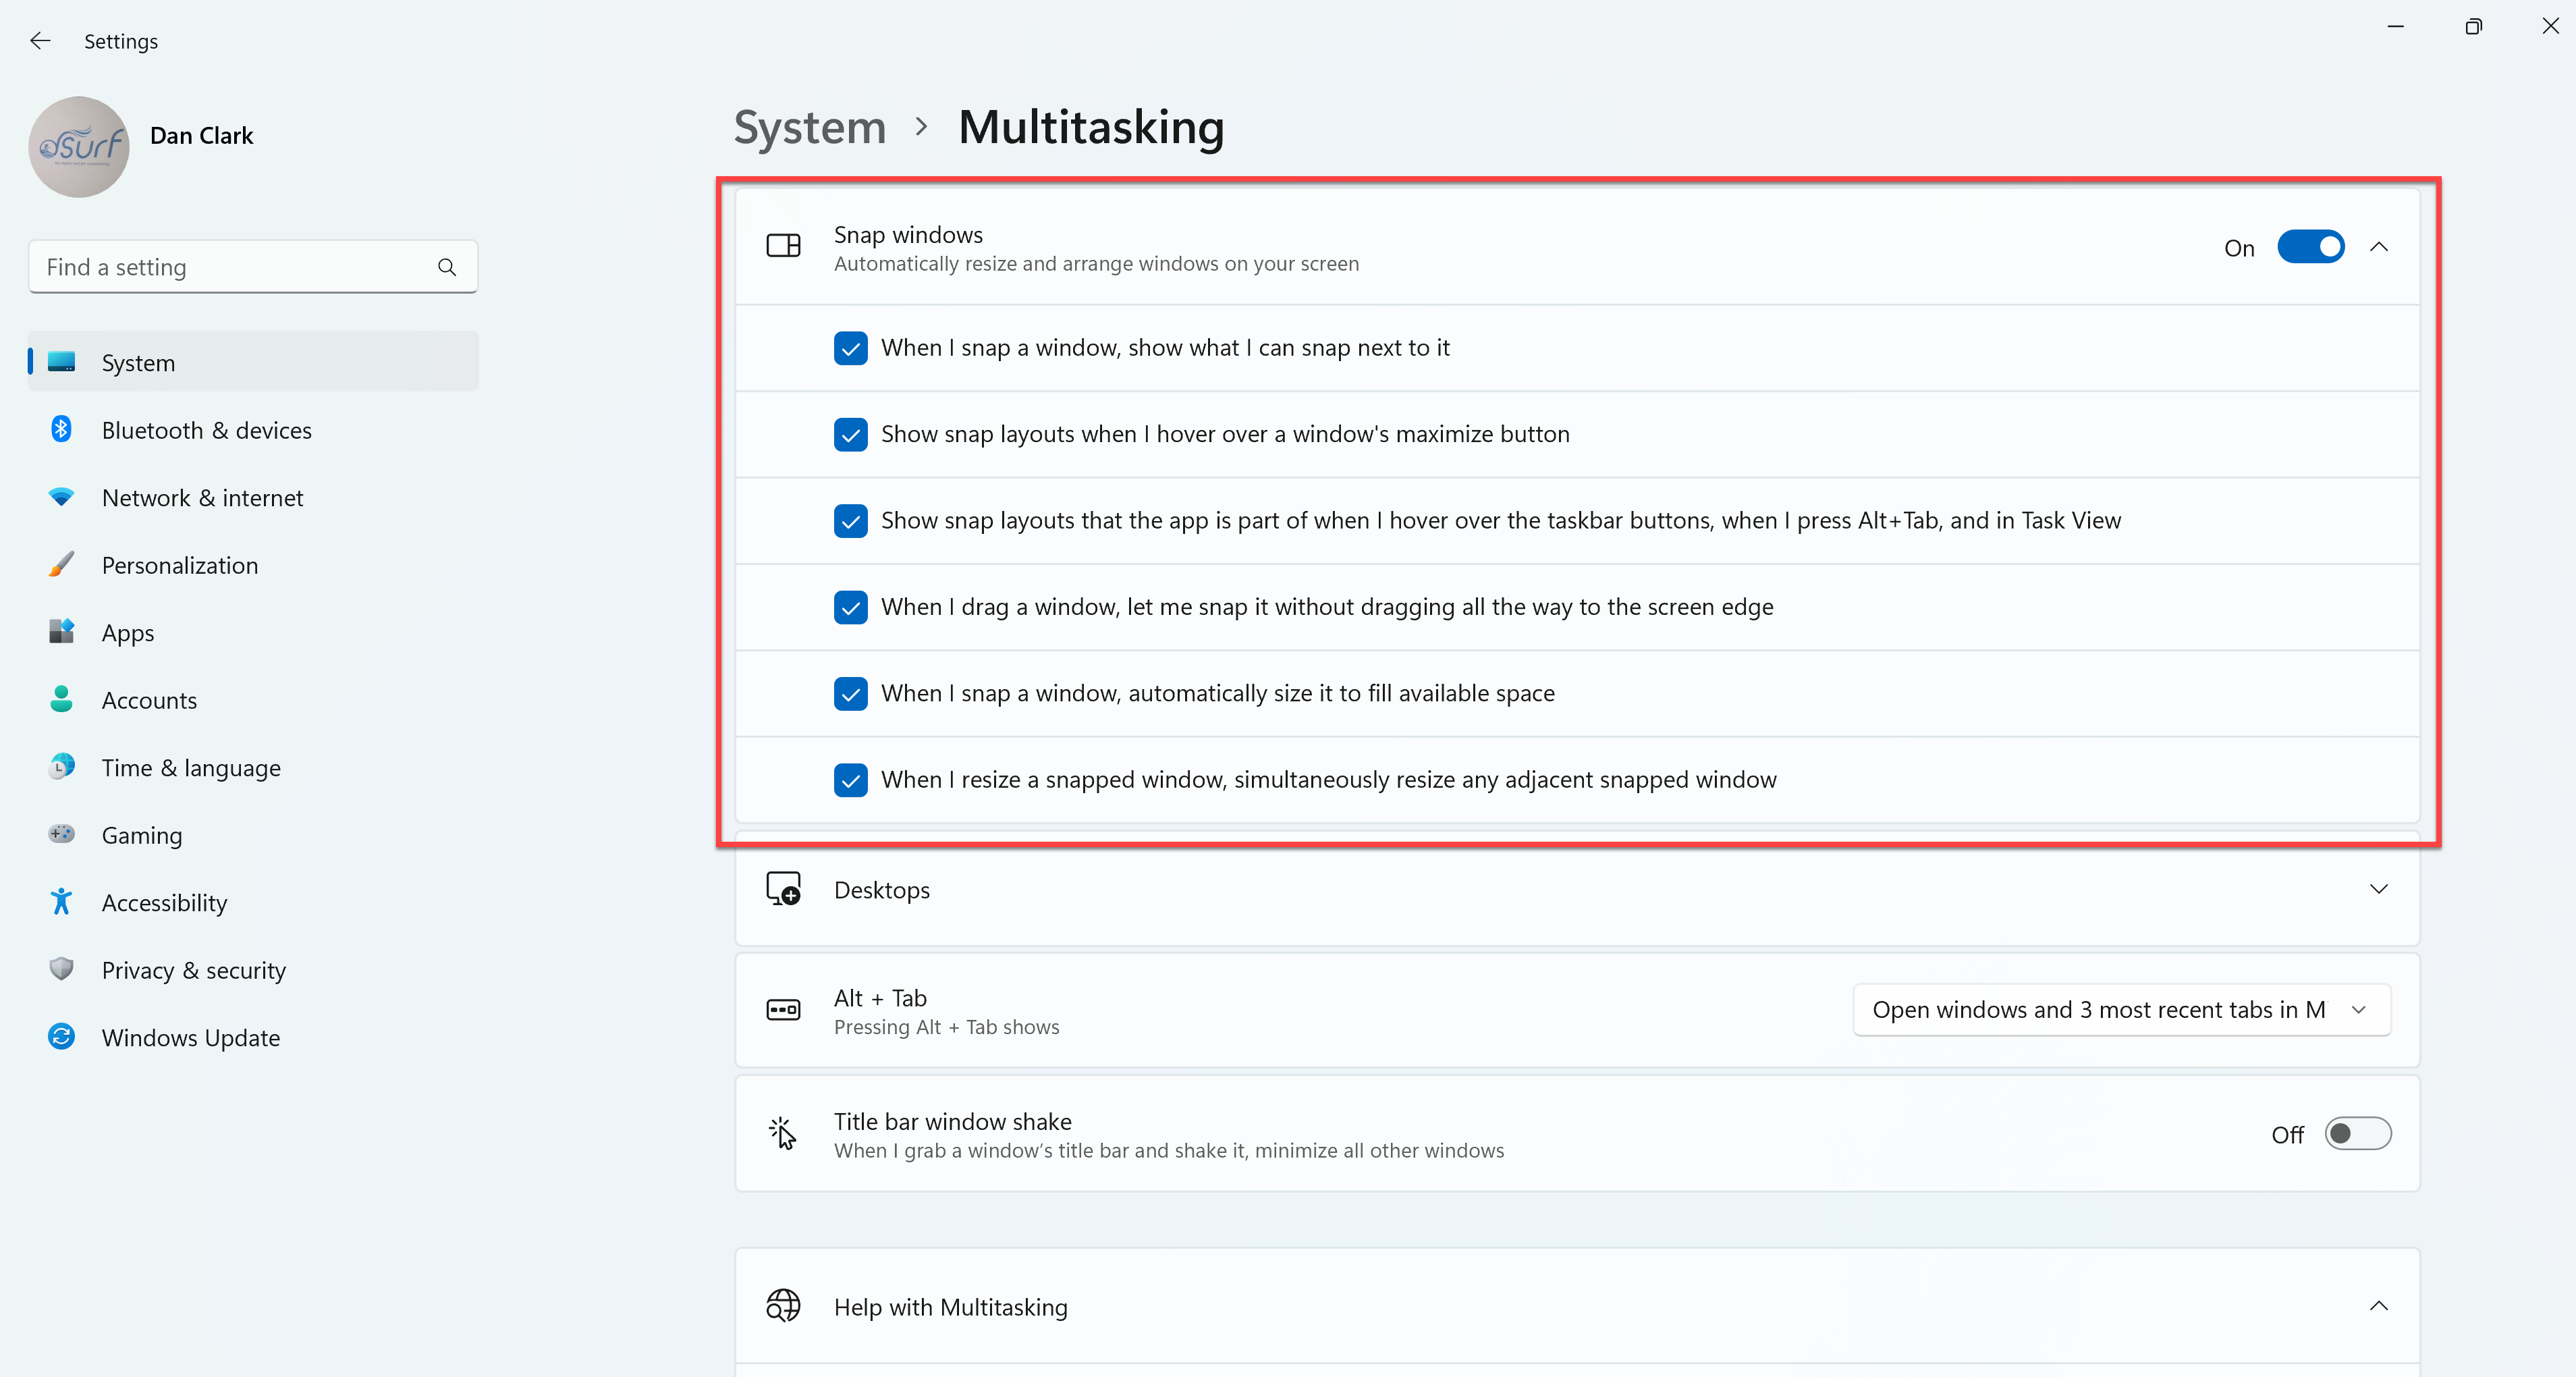
The settings for snap windows are expanded.
- You may press the tab key to explore the available options, such as “When I snap a window, show what I can snap next to it” and more.
- I am going to leave everything here checked, or on, and I will press ALT+F4 to close the Windows Settings app.
When you are finished, close any apps you may have opened for practice. Thanks for joining me in this lesson on using Windows snap layouts, snap assist, and snap groups.