

Windows 11 with JAWS
The Settings App in Windows 11, Revised
Author’s Note: This lesson is certified accurate for Windows 11 version 23H2 (March 2024).
Lesson 9
NEW VERSION. This content has been updated by removing items (Focus Assist, etc.) that Microsoft have changed since this initial recording. See also the additional “Author’s Notes” in several spots within the lesson for more information.
Resources
ZIP file of all resources for lesson 9 (alternatively, download individual files below)
Back to Windows 11 Training Page
Objectives
By the end of this lesson you will understand, be able to discuss, and/or perform the following tasks as they relate to the Settings app in Windows 11:
- List at least two ways to open the Settings app in Windows 11
- Navigate through the different settings categories and within the individual settings for each category.
- Move quickly back to the Search edit box from anywhere in the settings screens
- Move back to the prior Settings page after moving forward one or more pages
- Use Windows Settings to enable or disable Bluetooth on your device
- Use of lists for navigation, both vertical and horizontal
- Discuss the changes to Accessibility settings
- List the keystroke to instantly open Windows Accessibility settings
Changes to Settings in Windows 11
The Settings app in Windows 11 has been redesigned into a list of categories in a sidebar on the left one-third side of the screen. The sidebar shows all available options as tabs in a vertical column. The sidebar and category tabs on the left side of the screen remain visible the entire time. When a category is activated with either the spacebar or a left-mouse click the options within that category appear in the main part of the screen on the right.
Opening the Windows Settings App
There are at least three ways to open Settings in Windows 11:
- Open the Start menu and type “Settings” followed by pressing ENTER.
- Press WINDOWS key+I.
- Open the Quick Settings panel from the right margin by clicking the speakers/headset button in the System Tray or by pressing WINDOWS key+A. The “All Settings” button is on the bottom right of this panel and can be activated with a left-click of the mouse pointer or by pressing the SPACEBAR or ENTER once it gains focus.
- Press WINDOWS key+I to open the Windows 11 settings.
Focus is in the “Find a Setting” search edit box at the top left side of the screen. The currently selected category is System.
Author’s Note: Starting with the 22H2 KB5030310 Build 22621.2361 of Windows 11 the first item in the list is Home. The Home page in Settings provides an overview of your device, quick access to key settings, and helps manage your Microsoft account. Since the Home page offers you a dynamic and personalized experience, each user’s Home page in Settings will be somewhat different. Feel free to explore the Home page using the TAB and ARROW keys. However, to continue with this lesson DOWN ARROW past the Home category at the top of the list of settings and activate the System category instead.
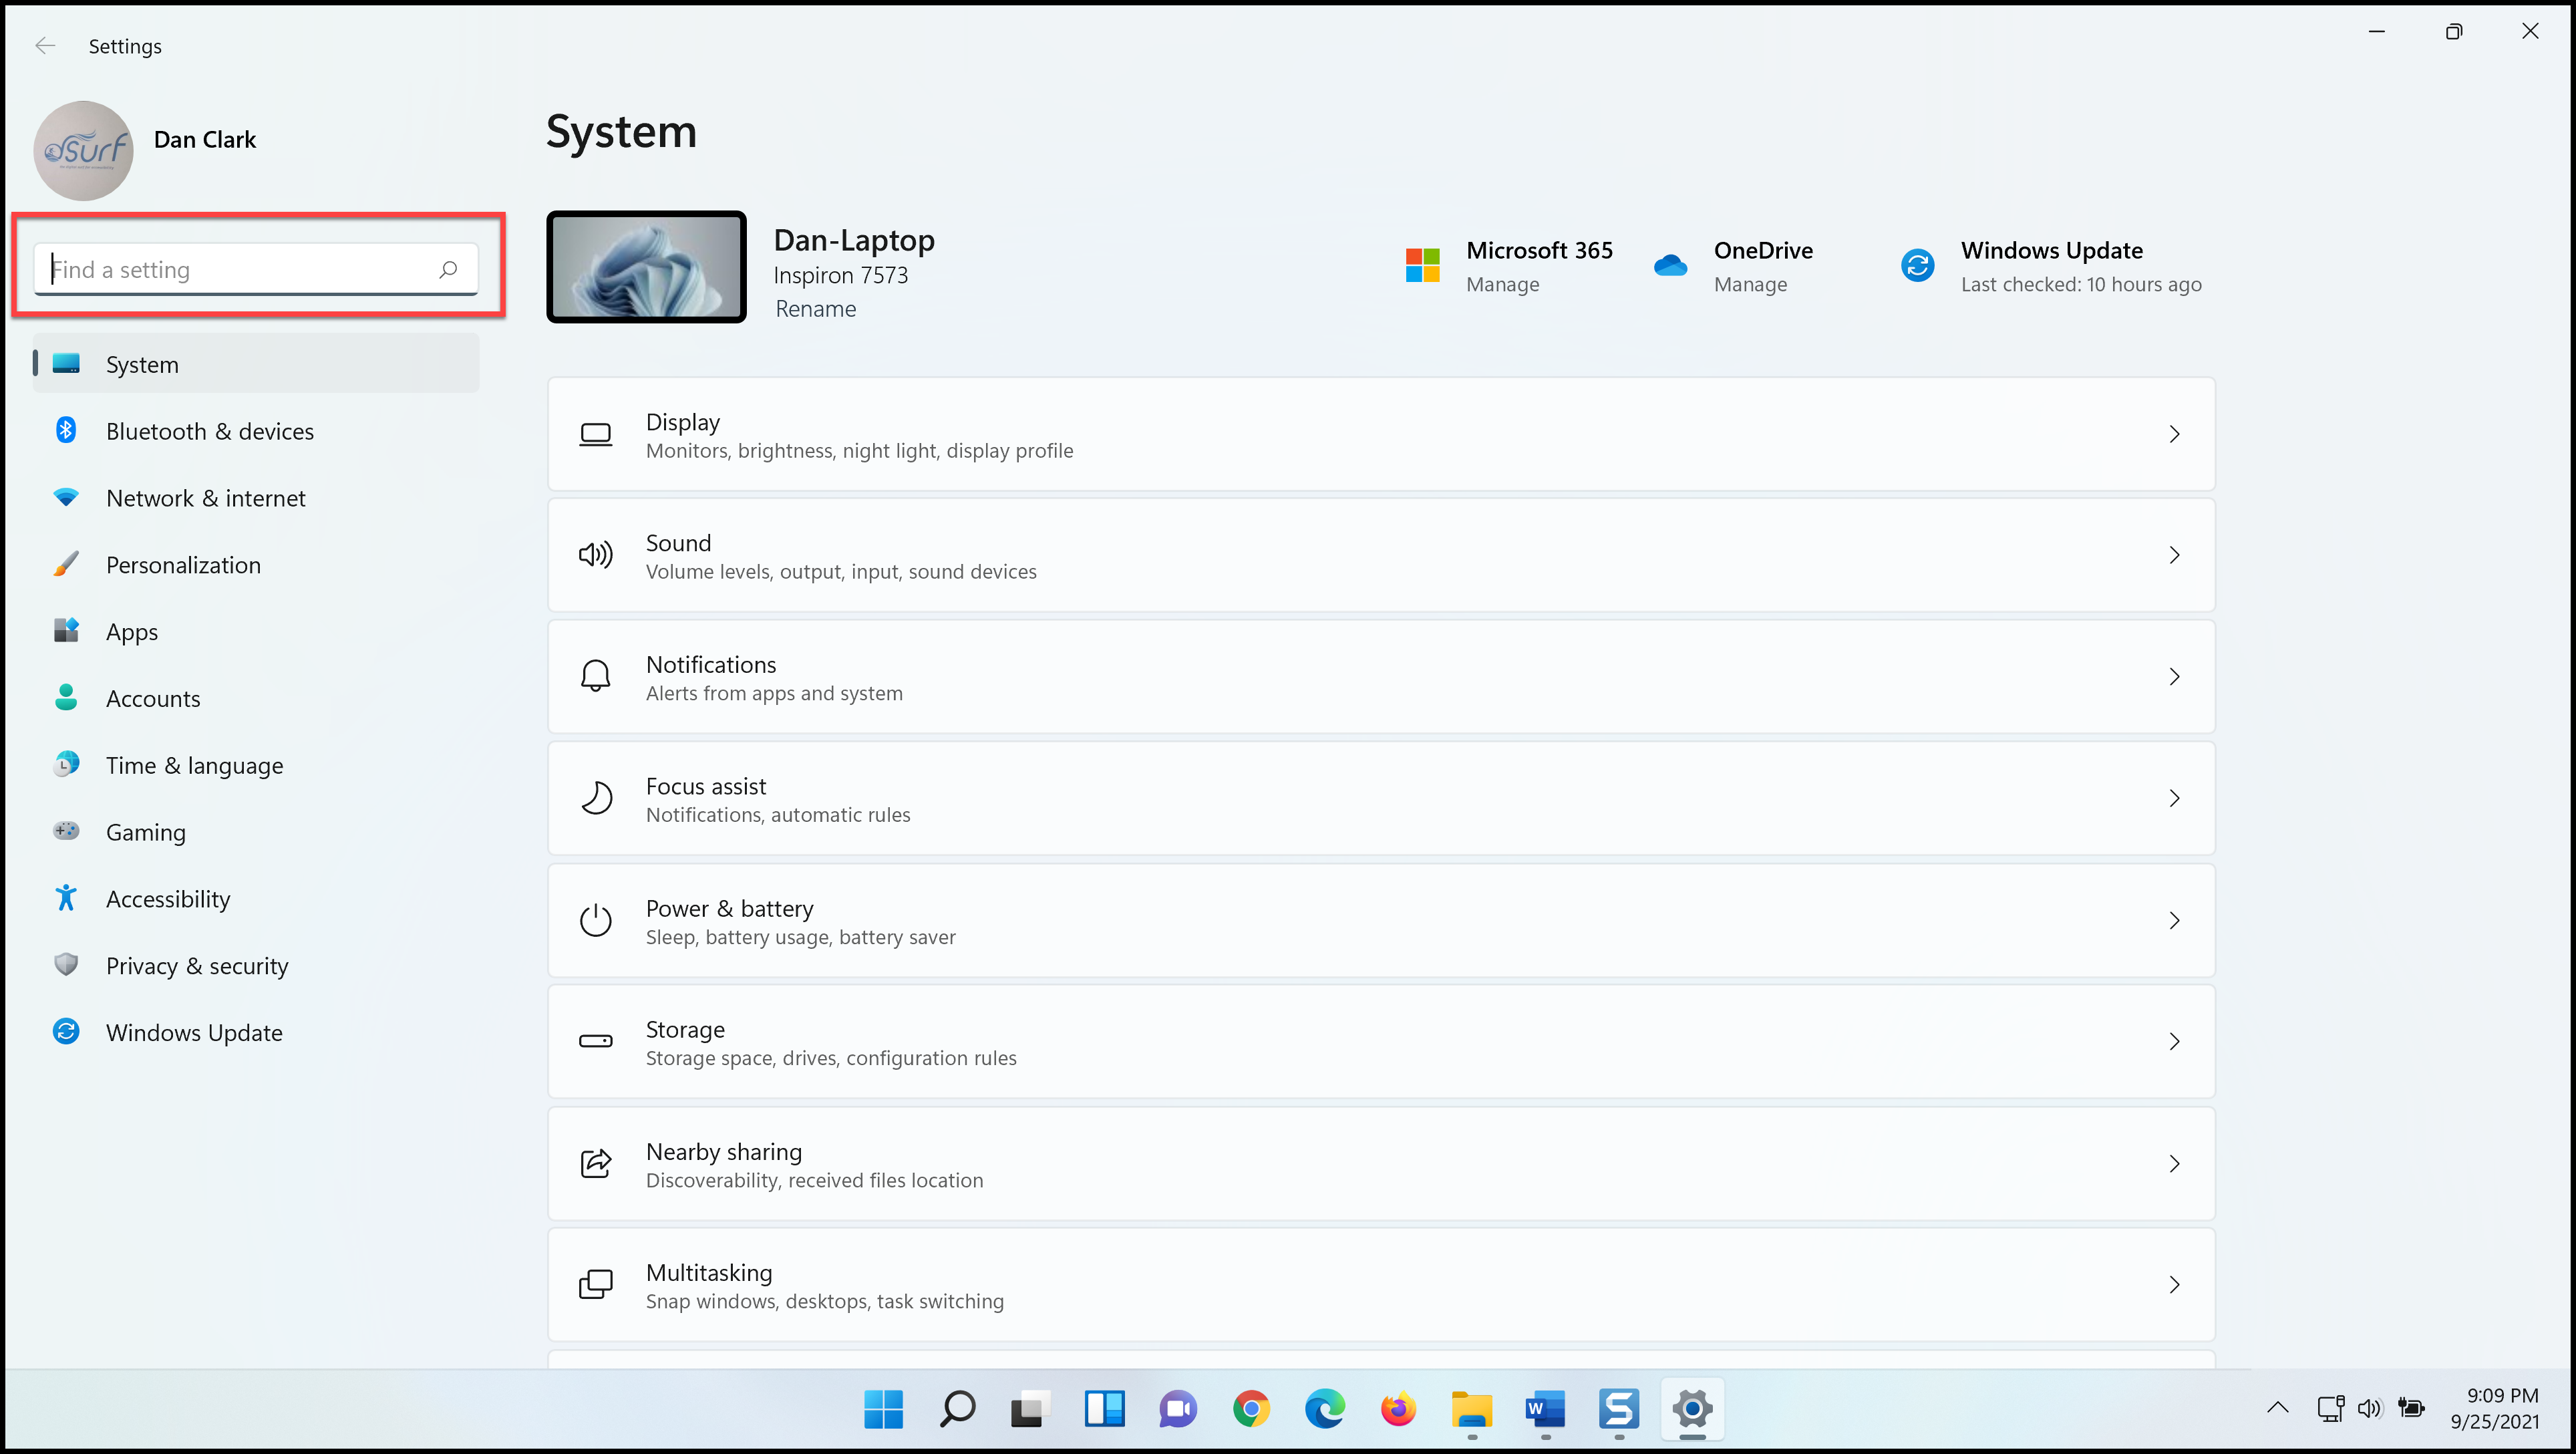
You can return focus quickly to the search edit box at the top of the category panel from anywhere in the Settings app by pressing CTRL+E.
- Move to the categories in the left sidebar area by pressing the TAB key.
Once there, you may press UP or DOWN ARROW to move through the various categories. To open the settings for a given category on the right side of the screen press ENTER or SPACEBAR. Be sure to activate the System category before continuing the lesson.
- Explore the rest of the dialog box first by pressing the TAB key.
On my PC, JAWS said focus moved to a list with fifteen items. Navigation through lists like these depends on the orientation of the list vertically or horizontally, and the ARROW keys are typically used. In this case, pressing DOWN ARROW moves focus through the list of available settings grouped within the System category.
Activating an item in a list by pressing SPACEBAR or ENTER changes the screen to show updated content in the right two-thirds of the screen for that Windows setting.
To go back to a prior level, press ALT+LEFT ARROW. Continuing to press this key combination moves backwards in the settings history.
A “Back” button also becomes available at the top left side of the screen in Windows settings for mouse or keyboard users after moving forward. Left-click it with the mouse pointer or use ALT+LEFT ARROW to activate it.
- Move back to the Search edit box by pressing TAB twice more.
Bluetooth Settings
- Open the Windows Settings app if you do not already have it open by pressing WINDOWS key+I.
- Press TAB to move to System in the category panel, and then press DOWN ARROW to move to “Bluetooth & devices.”
System, 1 of 11, Bluetooth & devices, 2 of 11
- Next, press SPACEBAR.
The settings for Bluetooth and other devices open on the right side of the screen.
- Press TAB to move through the items here and stop on the button for turning Bluetooth on or off.
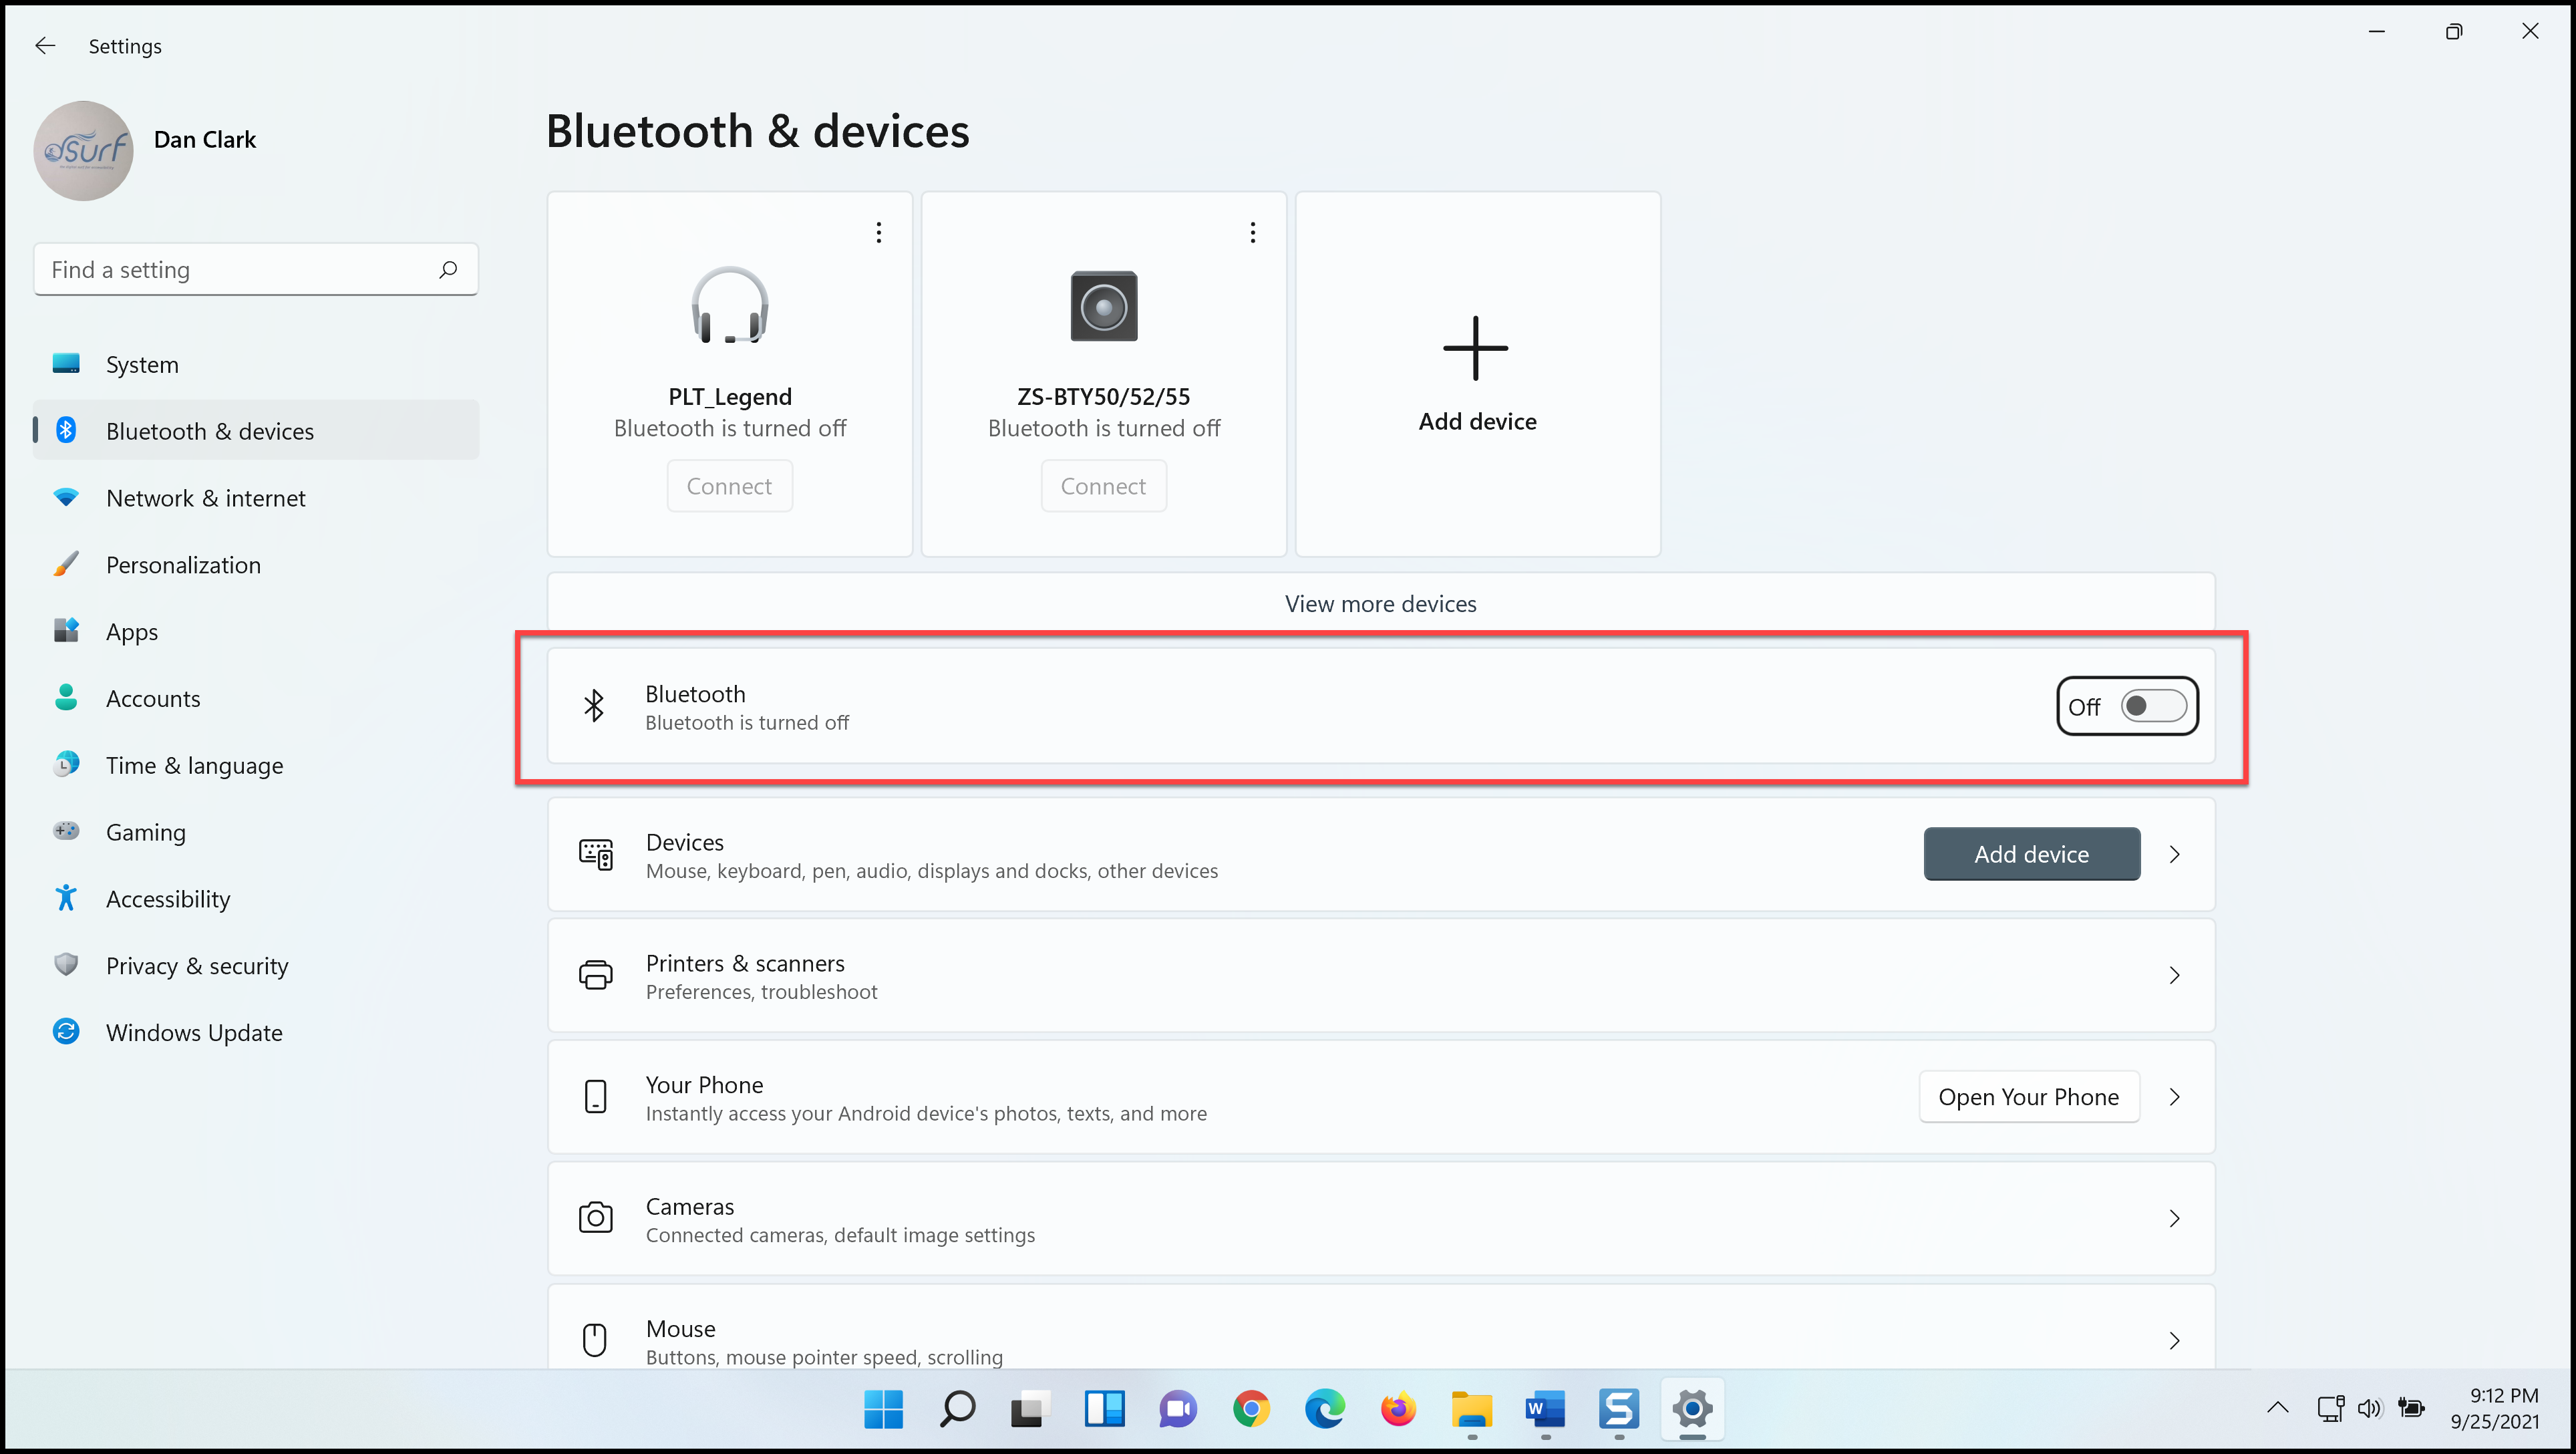
I find the following on my computer: Bluetooth and devices button, list box, TP19, 1 of 3, TP19 more options button, TP19 Bluetooth is turned off, Add device button, View more devices button, Bluetooth button, Off.
- Currently, Bluetooth is off on my computer. I am not going to turn on Bluetooth right now, however you may press SPACEBAR to toggle this button on or off.
- There is no need to save the changes to settings in Windows. After making changes, just close the window. I will do that now by pressing ALT+F4. Alternatively, just left-click the X button at the top right of the screen for Settings.
Windows Settings closes and focus on my computer returns to the Windows desktop.
Controls and States in the Windows Settings App
In the next few segments, we discuss several types of controls and control states you may find in the Windows Settings app. Changes are still occurring from a Windows development point of view. Appearances of controls and control types as well as their functional behavior may also change over time.
Some of the basic controls work as expected. For example, buttons and check boxes can be activated using spacebar or by left clicking them with the mouse pointer. Selection in combo boxes can be accomplished using up or down arrow, or alt+down arrow to open a combo box selection list and alt+up arrow to close a combo box selection list.
However, there are several unique control types found within the Windows Settings app. Interaction with these controls may be different than what one might expect so we look at how to interact with a few of them in the next part of this lesson.
Lists or List Boxes
Lists or list boxes may be oriented vertically or horizontally.
For vertical list navigation use the UP and DOWN ARROW keys.
For horizontal list navigation use the LEFT and RIGHT ARROW keys.
To move to the beginning or end of a list press HOME or END.
Note that navigation typically does not wrap in lists when using the arrow keys, nor can one use first letter navigation to move quickly among list items.
To activate an item in a list press SPACEBAR or ENTER or left-click it with the mouse pointer.
Vertical List Example
There are a couple of vertical list box items found on the first screen when the Windows Settings app opens.
- Open the Windows Settings app by pressing WINDOWS key+I now if it is not already open on your computer.
Focus is in the “Find a Setting” search edit box.
- Move to the System tab in the left column by pressing the TAB key.
(Author’s Note: Since the first item in the left column is now Home, move to the System category by pressing DOWN ARROW a couple of times, and then activate it by pressing SPACEBAR or ENTER.)
This is the beginning of a list of eleven items on my PC. You may press the UP or DOWN ARROW as well as the HOME or END keys to traverse this list.
- Move to the next list on the screen by pressing TAB several times.
These are the items that show up when you choose System in the list of categories on the left side of the screen. This list, beginning with Display, then Sound, etc. is another example of a vertically oriented list box and takes up most of the screen on the right, comprising about two-thirds of the screen.
Spend a few moments using the UP or DOWN ARROW as well as the HOME or END keys to traverse this list.
Horizontal List Example
- For an example of a horizontal list box, open the Windows Settings app by pressing WINDOWS key+I now if it is not already open on your computer. Focus is in the “Find a Setting” search edit box. To move directly to the search edit box from anywhere in Settings just press CTRL+E. I will press that now.
- Move to the Bluetooth & Devices tab in the list of categories by pressing TAB to move to the System category tab followed by DOWN ARROW.
- Activate the Bluetooth & Devices category tab by pressing SPACEBAR.
The right two-thirds side of the screen changes to show Bluetooth & Devices settings and controls.
- Move to the list of recent Bluetooth devices by pressing TAB.
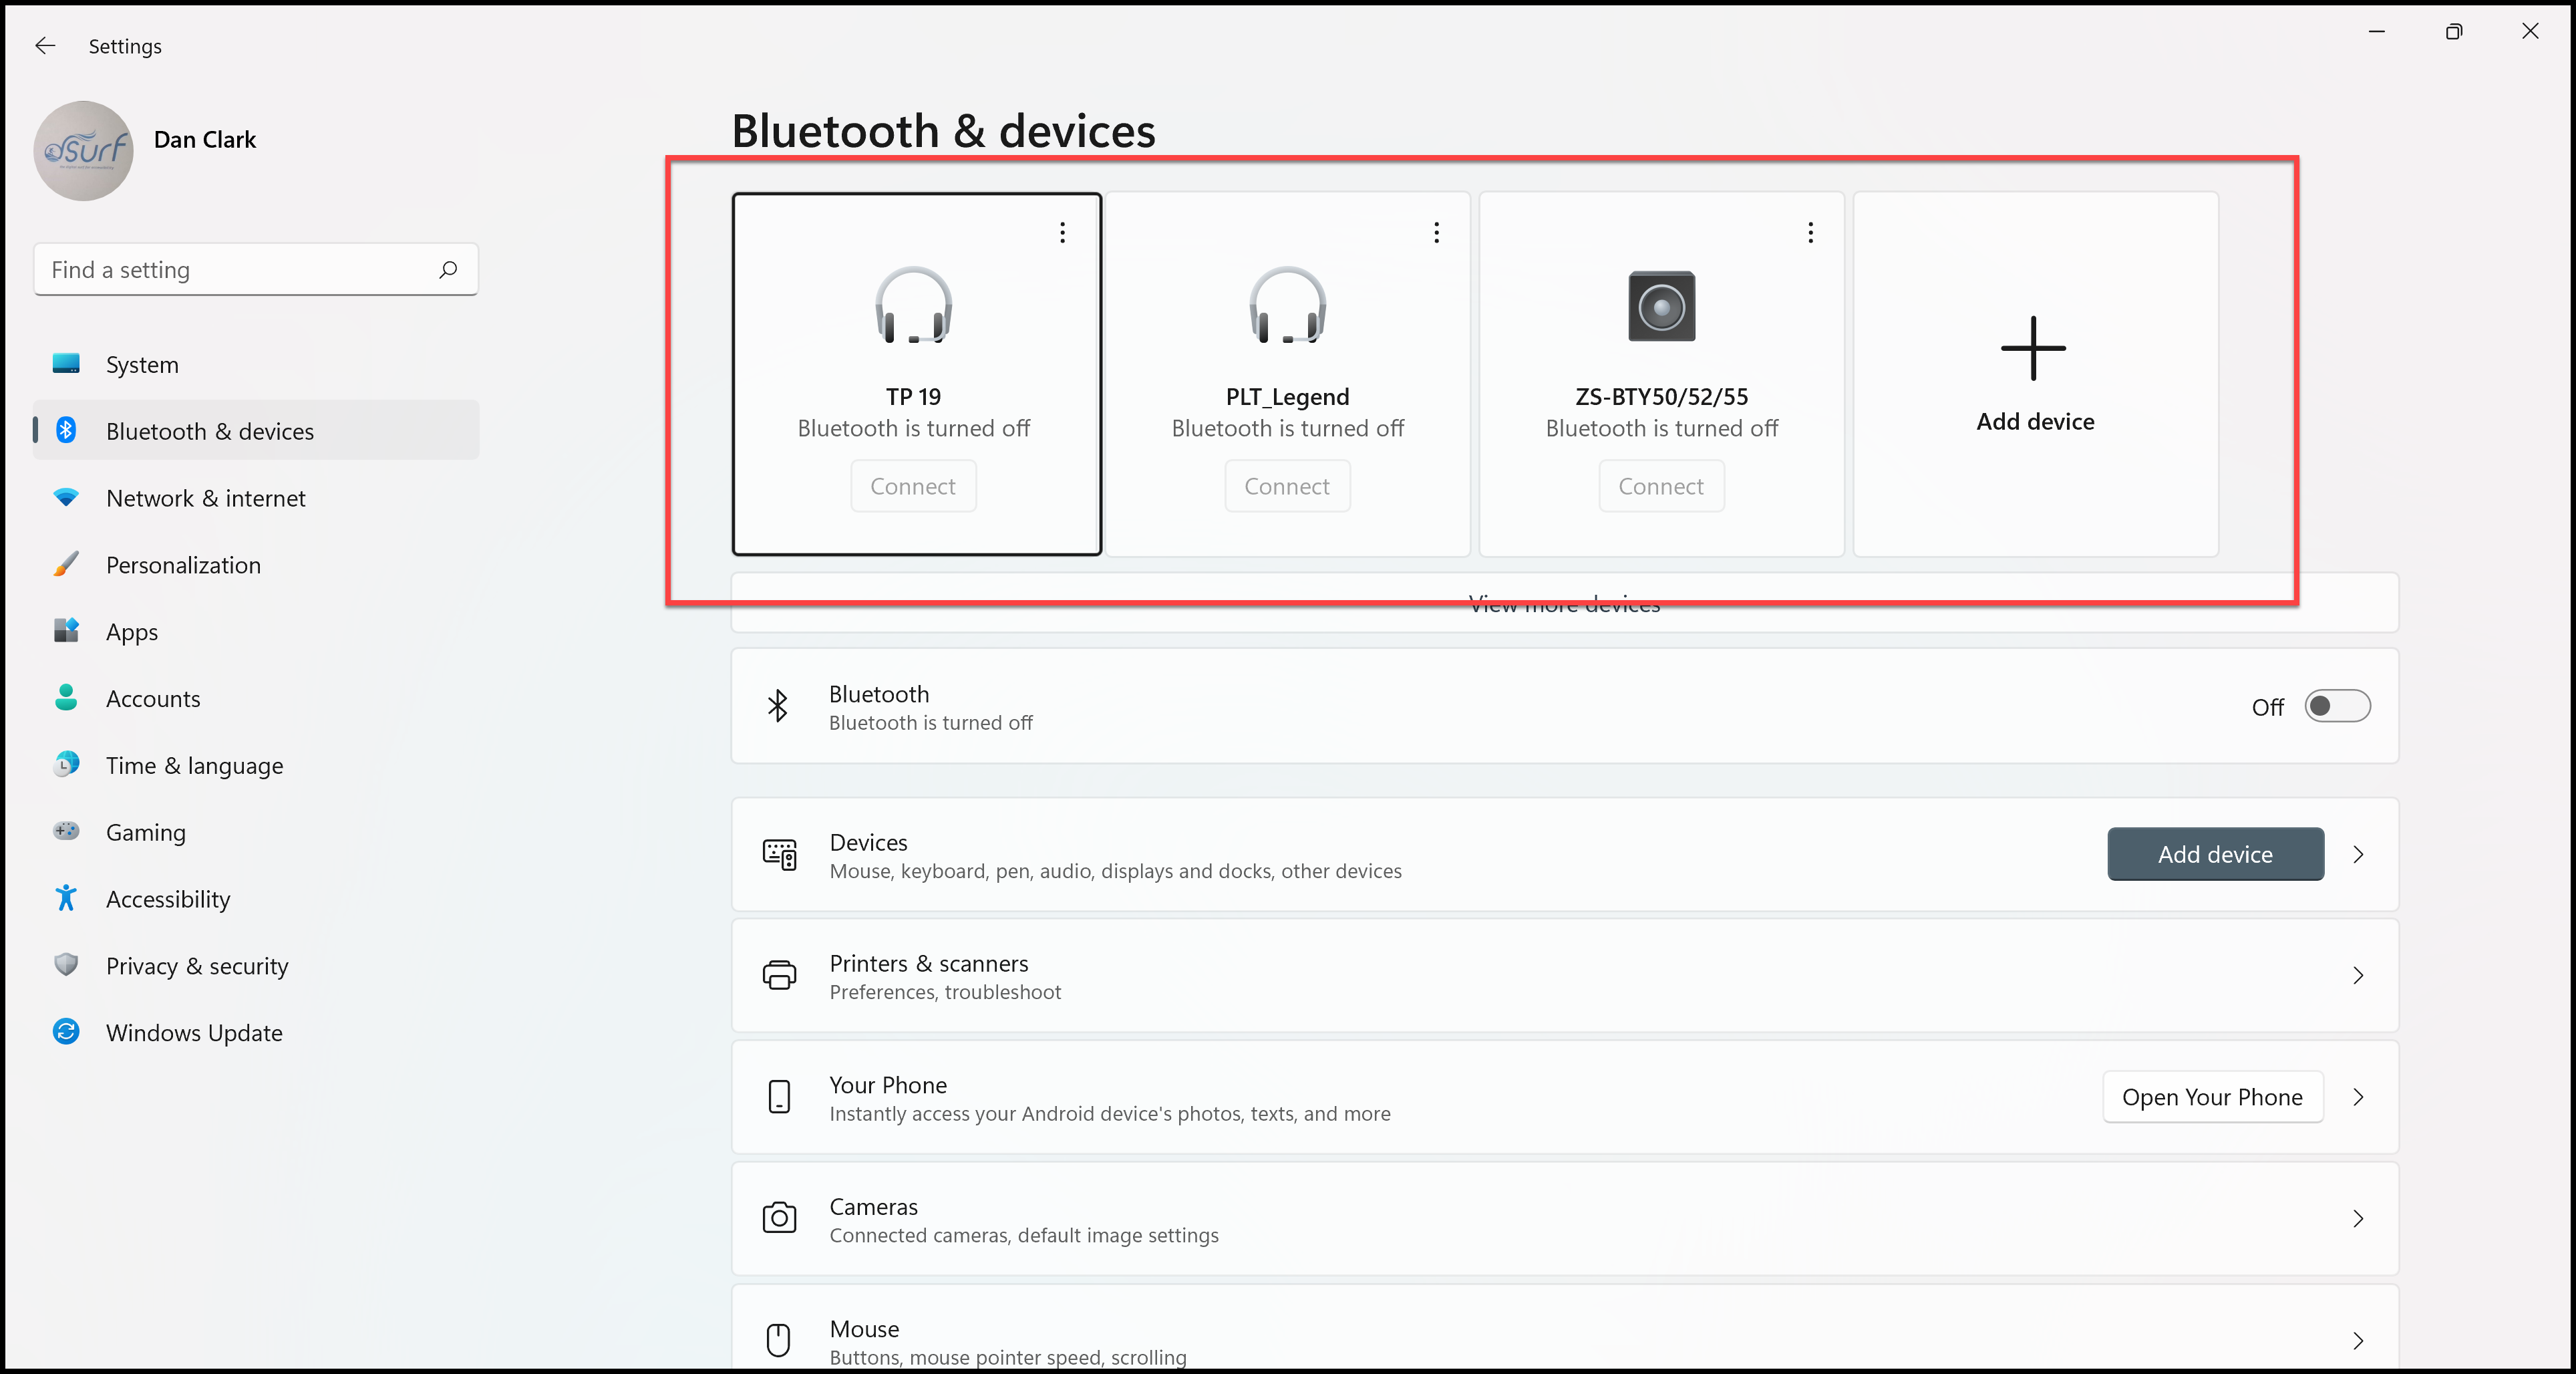
- Since this is a horizontally oriented list, use LEFT and RIGHT ARROW as well as the HOME or END keys to traverse it. I will press RIGHT ARROW.
The breadcrumb buttons at the top of the main part of the Windows Settings app screen, discussed later in this session, exhibit another example of a horizontal list.
Back Button
After going to different settings, a Back button appears at the top left side of the screen. You may find it, when present, by pressing shift+tab to move backwards from the Find a Setting search edit box. Once the Back button is available you may also activate it with the keyboard using alt+left arrow or backspace or by left-clicking it with a mouse. Press ALT+F4 to close the Settings app in Windows.
Slider Controls
The slider controls in the Windows Settings app behave like slider controls in other apps, with one exception. Let us look now at an example of a slider bar control.
Open the Windows Settings app if you do not already have it open by doing the following:
- Press WINDOWS key+I.
Focus is in the Find a Setting search edit box.
(Author’s Note: Since the first item in the left column is now Home, move to the System category by pressing DOWN ARROW a couple of times, and then activate it by pressing SPACEBAR or ENTER.)
- In the main part of the screen is the list of separate groups available in the Settings app. Move to Display, the first item in the list, by pressing TAB several times.
Remember, when you hear an item in a list announced you need to switch to using the arrow keys to view the other items in the list. If you press tab again here, the remaining fourteen items in this list are skipped.
- This is a vertical list, so move to Sound in the list by pressing the DOWN ARROW key.
- Open the Sound settings by pressing SPACEBAR.
- Move to the volume adjustment slider bar by pressing TAB several times.
You may use the RIGHT or LEFT ARROW keys in this slider bar to adjust the volume up or down. You may also press HOME to move to 0%, which is no volume, or end to move the slider to 100%. Currently, pressing PGUP or PGDN to move in larger chunks is not available for this slider bar.
- When you are finished experimenting with the slider bar controls and have the volume set to your liking, press ALT+F4 to close the Settings app.
Accessibility
The “Ease of Access Center” found in Windows 10 has been changed to simply Accessibility in Windows 11. Accessibility Settings have been redesigned to make them easier to use.
- To directly open the Accessibility settings in Windows 11, press WINDOWS key+U.
- Move to the list box by pressing the TAB key several times.
This is the vertical list of settings categories in the left column, which as we reviewed earlier, you may navigate by using up or down arrow.
- Press TAB again.
This is the horizontal list of breadcrumb buttons across the top of the main part of the screen. Currently, there is only one button in the breadcrumb list since we have not yet explored the accessibility settings at a deeper level.
- Press TAB again.
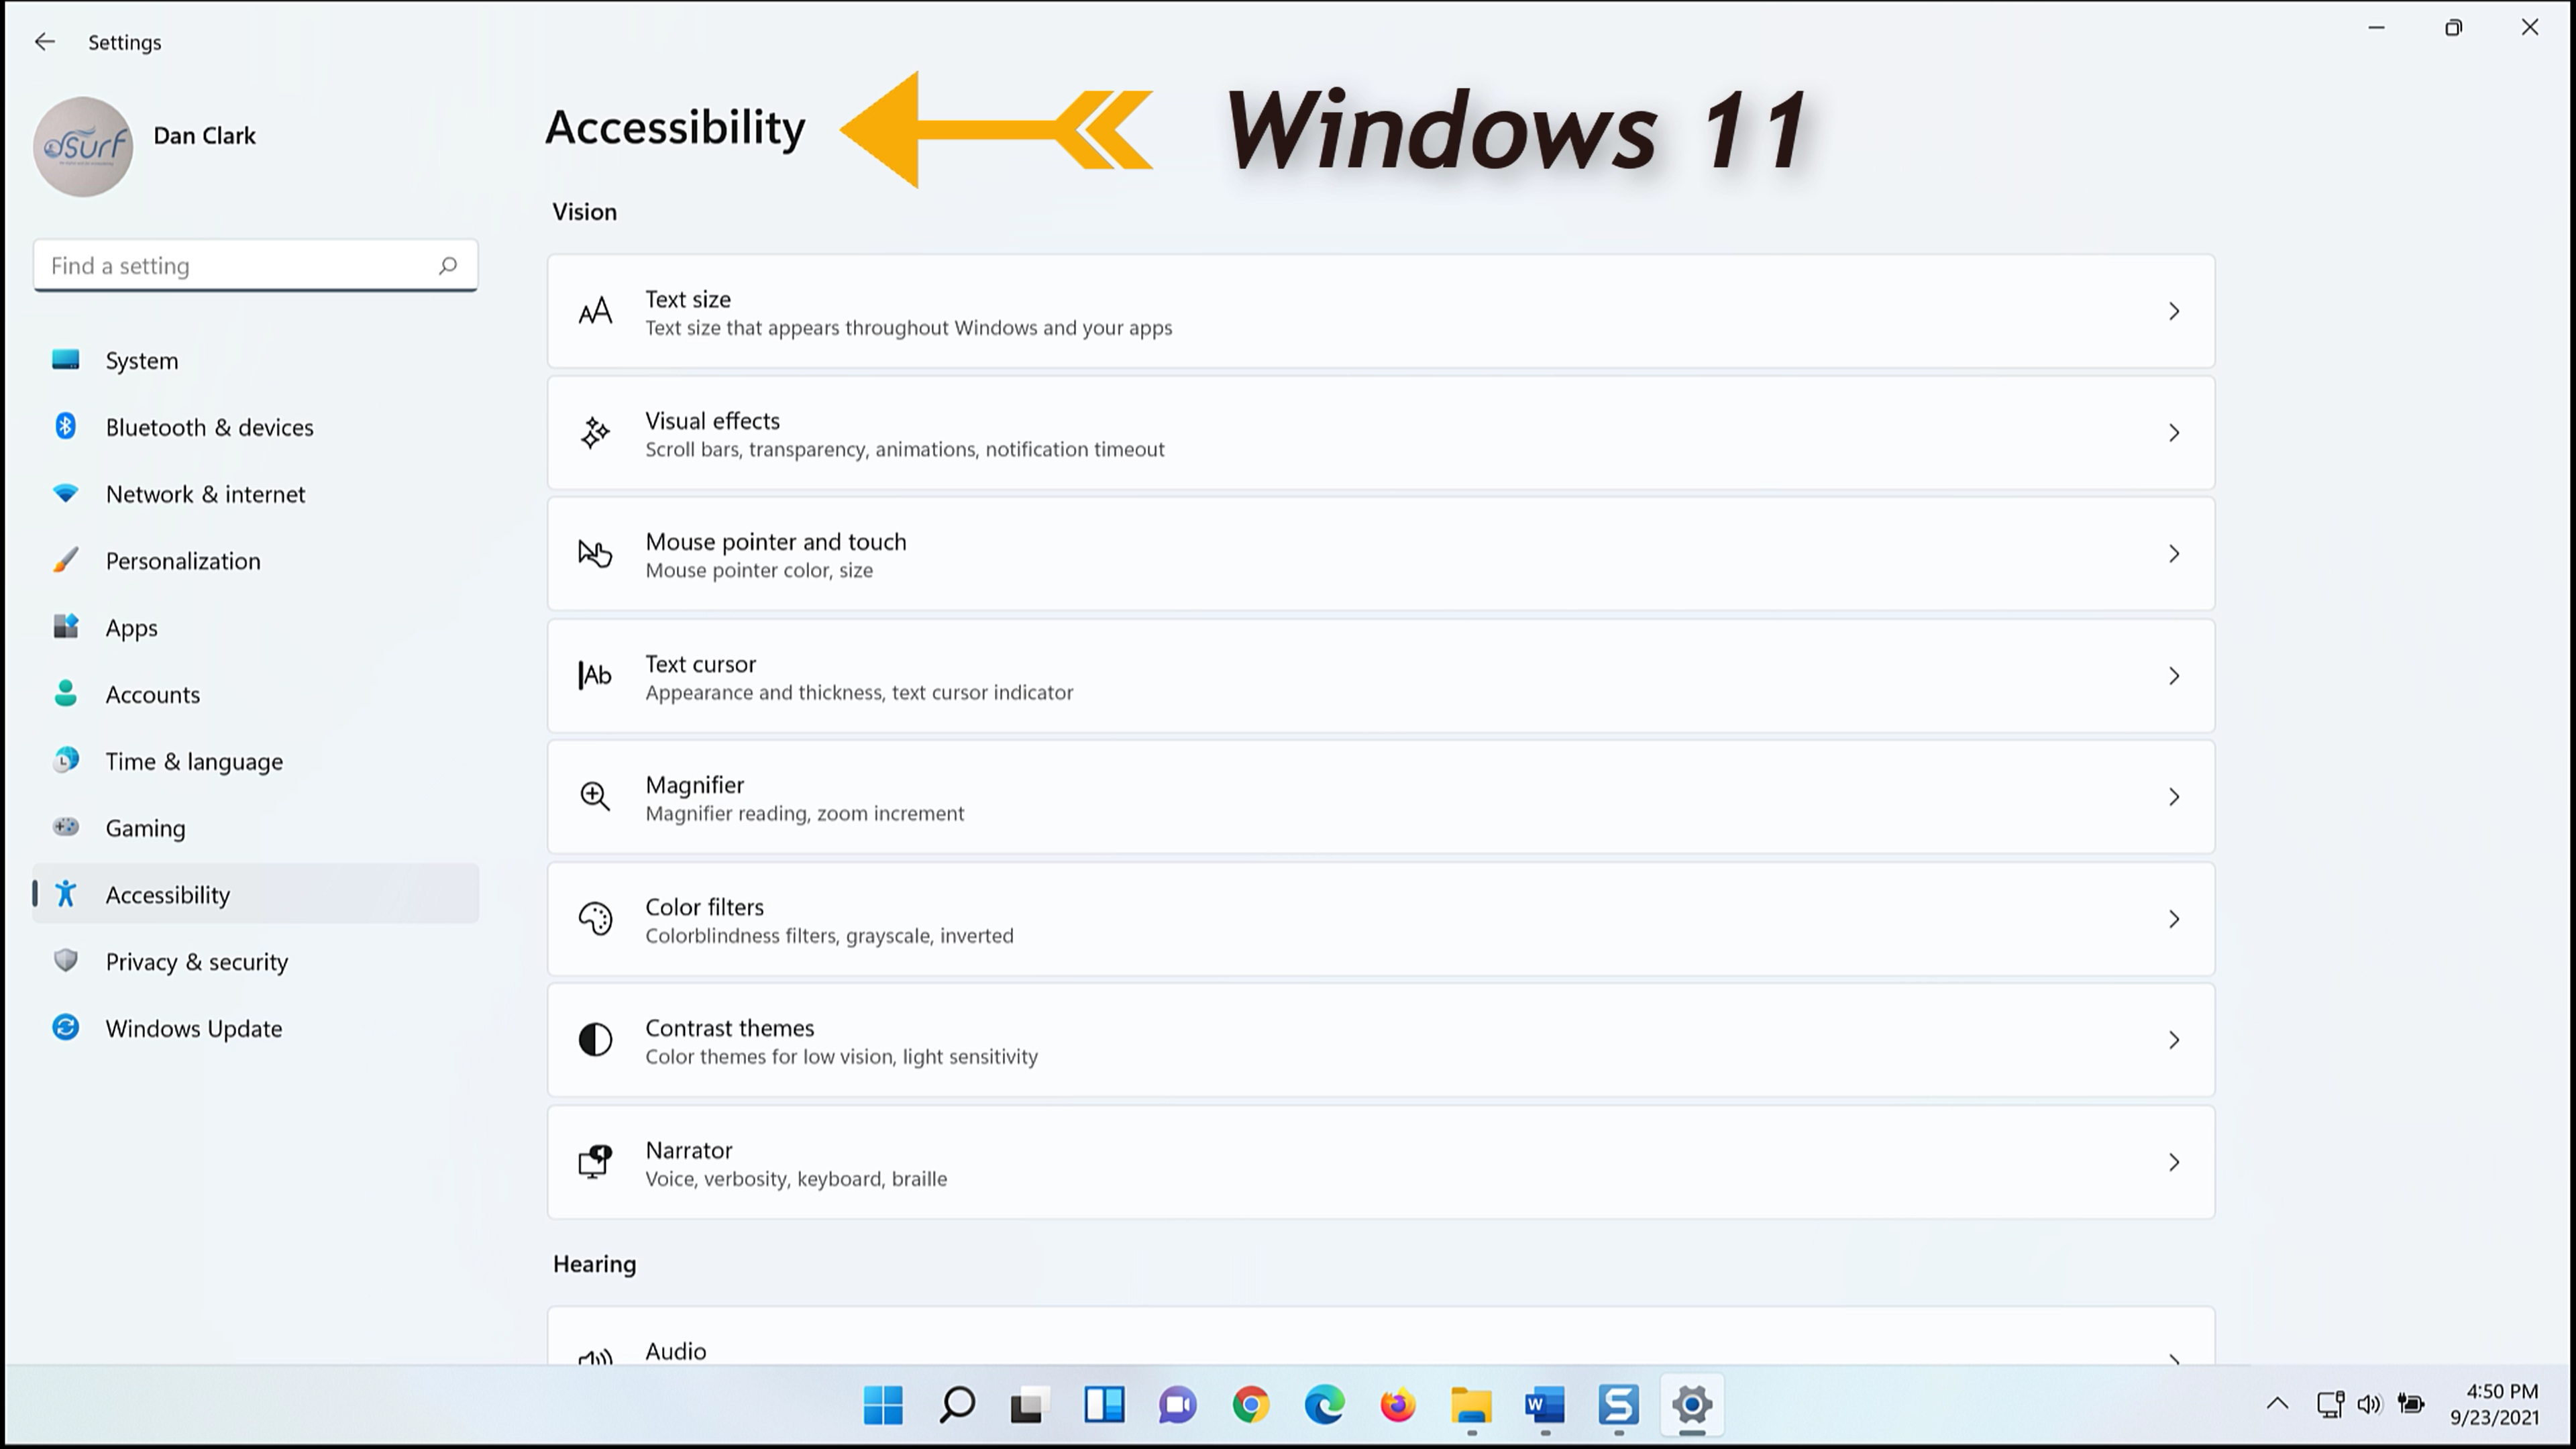
Here you have a list of three groups of different settings. The first is Vision, currently with eight items, followed by Hearing with two items, and Interaction with four items.
- Move to the first item in the Vision list by pressing DOWN ARROW.
Below the text size you find visual effects, mouse pointer color and size, text cursor, magnifier, and more. As you navigate down through the list beyond the last item in the Vision group, which is Narrator settings, you find the group of hearing settings for audio and captions. Finally, below that are the Interaction settings for speech, keyboard, mouse, and eye control.
Feel free to select any of these options by pressing the spacebar to explore the settings they offer.
- For now, press ALT+F4 to close the settings in Windows.
Thank you for joining me in this lesson on the Windows 11 Settings app.